Master the Art of Homemade Crepes: Your Go-To Easy Blender Recipe for Flawless Results
Are you searching for the secret to making truly exceptional crepes that are both incredibly delicious and surprisingly simple to prepare? Look no further! This comprehensive guide reveals the ultimate crepe recipe, designed to deliver perfect results every single time, even if you’re a beginner. Forget about complicated techniques or needing specialized equipment; our method leverages the power of your blender to create a silky-smooth batter effortlessly. From a delightful breakfast treat to an elegant dessert, these crepes are incredibly versatile, ready to be topped with whatever your heart desires. Imagine serving up light, airy crepes with fresh seasonal fruits, a dollop of whipped cream, and a dusting of powdered sugar – pure bliss! Let’s embark on this culinary journey together and discover how easy it is to make the best crepes you’ve ever tasted.
Why This Is The Best Crepe Recipe You’ll Ever Need
What makes this particular crepe recipe stand out from the rest? It boils down to three key factors: unparalleled flavor, consistent perfection, and astonishing simplicity. Each crepe boasts a delicate, rich flavor that perfectly complements both sweet and savory fillings. You’ll be amazed at how consistently they come out, with tender centers and beautifully crisp edges. The real game-changer here is the preparation method: a blender! Just toss all the ingredients in, hit the button, and let your blender do all the hard work. This eliminates lumps, ensures a smooth batter, and cuts down on prep time significantly, making homemade crepes accessible even on busy mornings. Whether you’re a seasoned chef or a kitchen novice, this recipe guarantees success.
No Special Equipment? No Problem! Frying Pan Crepes Demystified
Many people assume that making crepes requires a dedicated crepe maker or a specialized griddle. While those tools can be handy, they are by no means essential! You absolutely do not need a “crepe machine thingy” to achieve professional-quality crepes. For years, I’ve relied on a trusty frying pan, and it delivers flawless results every single time. If you own a crepe maker, feel free to use it, but rest assured that your standard non-stick frying pan will work beautifully. The key is understanding the technique, which we’ll cover in detail, to ensure perfect thinness and even cooking. So, grab your favorite frying pan, and let’s get ready to make some incredible crepes!
Step-by-Step Guide: How to Make These Perfect Blender Crepes
Making crepes might seem intimidating, but with our straightforward blender method and precise frying pan instructions, you’ll be flipping like a pro in no time. Follow these steps carefully for consistently perfect, delicious crepes.
Ingredients for The Best Crepes (Yields approximately 20 crepes)
- 2 cups all-purpose flour
- 4 large eggs
- 1/4 teaspoon salt
- 1 tablespoon vanilla extract (for that exquisite aroma and flavor)
- 2 cups milk (whole milk works best for richness, but any kind will do)
- 3 tablespoons melted unsalted butter (adds incredible flavor and helps with pliability)
Ensure all ingredients are at room temperature for the smoothest batter and best results.
Detailed Cooking Instructions:
- Prepare the Batter in a Blender: Combine all ingredients (flour, eggs, salt, vanilla, milk, and melted butter) into your blender. Blend on high speed for about 30-60 seconds, or until the batter is completely smooth with no visible lumps. It should be thin, similar to heavy cream. Once blended, transfer the batter to a bowl, cover it, and ideally let it rest in the refrigerator for at least 30 minutes. This resting period allows the gluten to relax, resulting in more tender and less prone-to-tear crepes. If you’re in a hurry, you can skip this step, but resting does make a difference!
- Preheat Your Frying Pan: Place a small to medium non-stick frying pan (about 8-10 inches in diameter is ideal) over medium heat. It’s crucial not to have the heat too high, as this will burn the crepes before they cook through. A medium setting allows for even cooking and a beautiful golden color.
- Butter the Pan Generously: Keep a stick of butter or a small dish of melted butter close by. Using butter instead of non-stick spray adds a wonderful flavor and creates a superior texture. Place about a tablespoon of butter directly into the hot frying pan. Allow it to melt completely, then tilt the pan from side to side, ensuring the butter coats the entire cooking surface evenly. This initial buttering is vital. Repeat this step roughly every 3-4 crepes, or whenever you notice the pan starting to stick, to maintain a perfectly greased surface.
- Pour and Swirl the Batter: While holding the hot frying pan in one hand (off the heat for a moment), pour approximately 1/4 cup of batter into one side of the pan. Immediately begin tilting and swirling the pan in a smooth, circular motion. The goal is to evenly spread the batter across the entire bottom of the pan in a thin, uniform layer. Work quickly but gently. Once the batter has coated the pan, place it back on the heat.
- Cook the First Side: Allow the crepe to cook for about 30 seconds to 1 minute on this side. You’ll know it’s ready to flip when the edges start to look dry, slightly pull away from the pan, and small bubbles appear on the surface of the crepe. The color should be a light golden brown on the underside.
- Flip and Cook the Second Side: Carefully slide a heatproof spatula under the edge of the crepe to loosen it. Then, with a quick and confident motion, flip the crepe over to cook the other side. Cook for an additional 20-30 seconds until it’s lightly golden. The second side usually cooks faster.
- Stack and Repeat: Once cooked, slide the finished crepe onto a clean plate. You can stack them directly on top of each other; their thinness prevents them from sticking. Repeat steps 4-6, remembering to re-butter the pan as needed, until you’ve used all the batter.
Pro Tips for Flawless Crepes Every Time
- Rest Your Batter: As mentioned, letting the batter rest for at least 30 minutes (or even overnight in the fridge) makes a huge difference. It allows the flour to fully hydrate and the gluten to relax, resulting in a more tender crepe that’s less likely to tear.
- Temperature Control is Key: Maintain a consistent medium heat. If your pan is too hot, the crepes will burn quickly. Too cool, and they won’t brown properly and might turn out rubbery. Adjust the heat as you go.
- The First Crepe is Always a Test: Don’t get discouraged if your first crepe isn’t perfect. It’s often referred to as the “test crepe” because it helps you gauge if your pan is at the right temperature and if you’re using the correct amount of batter. Adjust accordingly.
- Thin is In: The hallmark of a great crepe is its thinness. Aim for a very thin layer of batter. A 1/4 cup for an 8-inch pan is usually a good starting point.
- Keep Crepes Warm: As you finish cooking, you can keep the stack of crepes warm by placing the plate over a pot of simmering water (creating a makeshift double boiler) or by covering them loosely with foil in a very low oven (around 200°F / 90°C).
Creative Crepe Topping Ideas to Elevate Your Experience
The beauty of crepes lies in their incredible versatility. They act as a blank canvas for an endless array of toppings, allowing you to customize them for any meal or mood. Here are some ideas to inspire your culinary creativity:
Sweet Crepe Toppings:
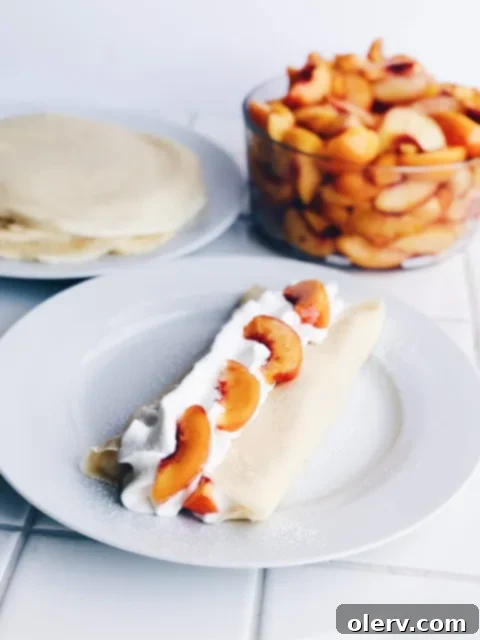
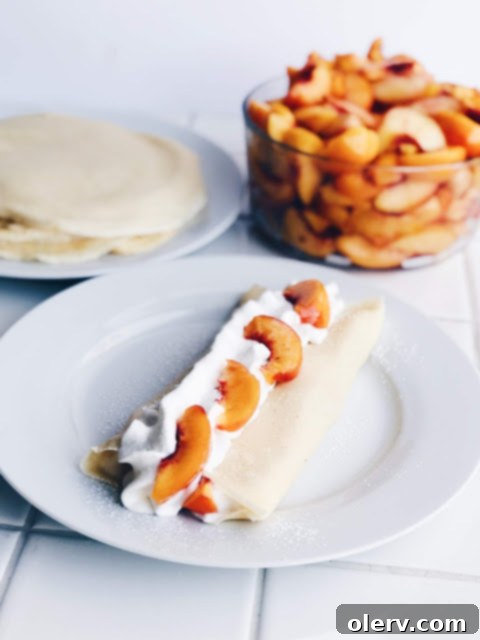
- Classic Fruit & Cream: Fresh sliced peaches (perfect for fall!), mixed berries, sliced bananas, or strawberries with a generous dollop of homemade whipping cream and a sprinkle of powdered sugar.
- Chocolate Lovers’ Dream: A generous spread of Nutella, melted chocolate, or chocolate syrup, perhaps with a side of sliced bananas or chopped nuts.
- Nutty Indulgence: Peanut butter or almond butter, combined with jam or jelly, or a drizzle of honey.
- Warm & Cozy: Sautéed apples with cinnamon, a sprinkle of brown sugar, or a rich caramel sauce.
- Maple Bliss: Simple yet satisfying, a drizzle of pure maple syrup.
Savory Crepe Ideas:
Don’t limit crepes to just sweet treats! They make fantastic savory meals too.
- Ham and Cheese: Melted Gruyere or cheddar cheese with thinly sliced ham, perhaps a sprinkle of fresh chives.
- Spinach and Feta: Sautéed spinach, crumbled feta cheese, and a hint of garlic.
- Mushroom and Swiss: Creamy sautéed mushrooms with melted Swiss cheese.
- Smoked Salmon: Cream cheese, smoked salmon, capers, and a sprig of fresh dill.
Experiment with your favorite flavors – the possibilities are truly endless!
Storing and Reheating Your Homemade Crepes
One of the great advantages of this recipe is that crepes can be made ahead of time! Whether you have leftovers or want to prep for a brunch, proper storage ensures they remain delicious.
- Refrigeration: Once cooled, stack the crepes with a piece of parchment paper between each one to prevent sticking. Wrap the stack tightly in plastic wrap or place them in an airtight container. They will stay fresh in the refrigerator for 2-3 days.
- Freezing: For longer storage, stack cooled crepes with parchment paper in between, then wrap the entire stack tightly in plastic wrap and place in a freezer-safe bag or container. They can be frozen for up to 1-2 months. Thaw in the refrigerator overnight before reheating.
- Reheating: You can quickly reheat crepes in a lightly greased non-stick pan over medium-low heat for about 15-30 seconds per side until warmed through. Alternatively, microwave individual crepes for 10-15 seconds, or warm a stack in a preheated oven (covered with foil) at 300°F (150°C) for about 5-10 minutes.
Now that you’ve mastered the art of making these incredibly easy and delicious blender crepes, it’s time to share the joy! Don’t forget to print this recipe for your collection, or better yet, pin it to Pinterest so you can easily refer back to it whenever a crepe craving strikes. Enjoy!
The Best Crepes

These are The Best Crepes! They have a delicious flavor and come out perfect every time thanks to our easy blender method. Get ready for flawless homemade crepes!
15 minutes
20 minutes
35 minutes
Ingredients
- 2 cups all-purpose flour
- 4 large eggs
- 1/4 teaspoon salt
- 1 tablespoon vanilla extract
- 2 cups milk
- 3 tablespoons melted unsalted butter
Instructions
- Place all ingredients (flour, eggs, salt, vanilla, milk, melted butter) in a blender, and blend on high until completely smooth, about 30-60 seconds. For best results, let batter rest in the refrigerator for at least 30 minutes.
- Heat a small to medium non-stick frying pan over medium heat. Add about 1 tablespoon of melted butter to coat the pan. Repeat buttering every 3-4 crepes or as needed.
- While holding the pan off the heat, pour approximately 1/4 cup of batter onto one side. Immediately tilt and swirl the pan in a circular motion to evenly coat the bottom with a thin layer of batter. Place the pan back on the heat.
- Cook the crepe for 30-60 seconds, or until the edges begin to crisp and pull away, and the surface shows small bubbles. The underside should be lightly golden.
- Using a heatproof spatula, gently flip the crepe and cook for an additional 20-30 seconds on the second side until lightly golden.
- Slide the cooked crepe onto a plate and continue with the remaining batter, repeating steps 2-5. Stack the finished crepes on top of each other.
- Serve warm with your favorite sweet or savory toppings such as fresh fruit, whipped cream, powdered sugar, Nutella, jam, or cheese and ham.
