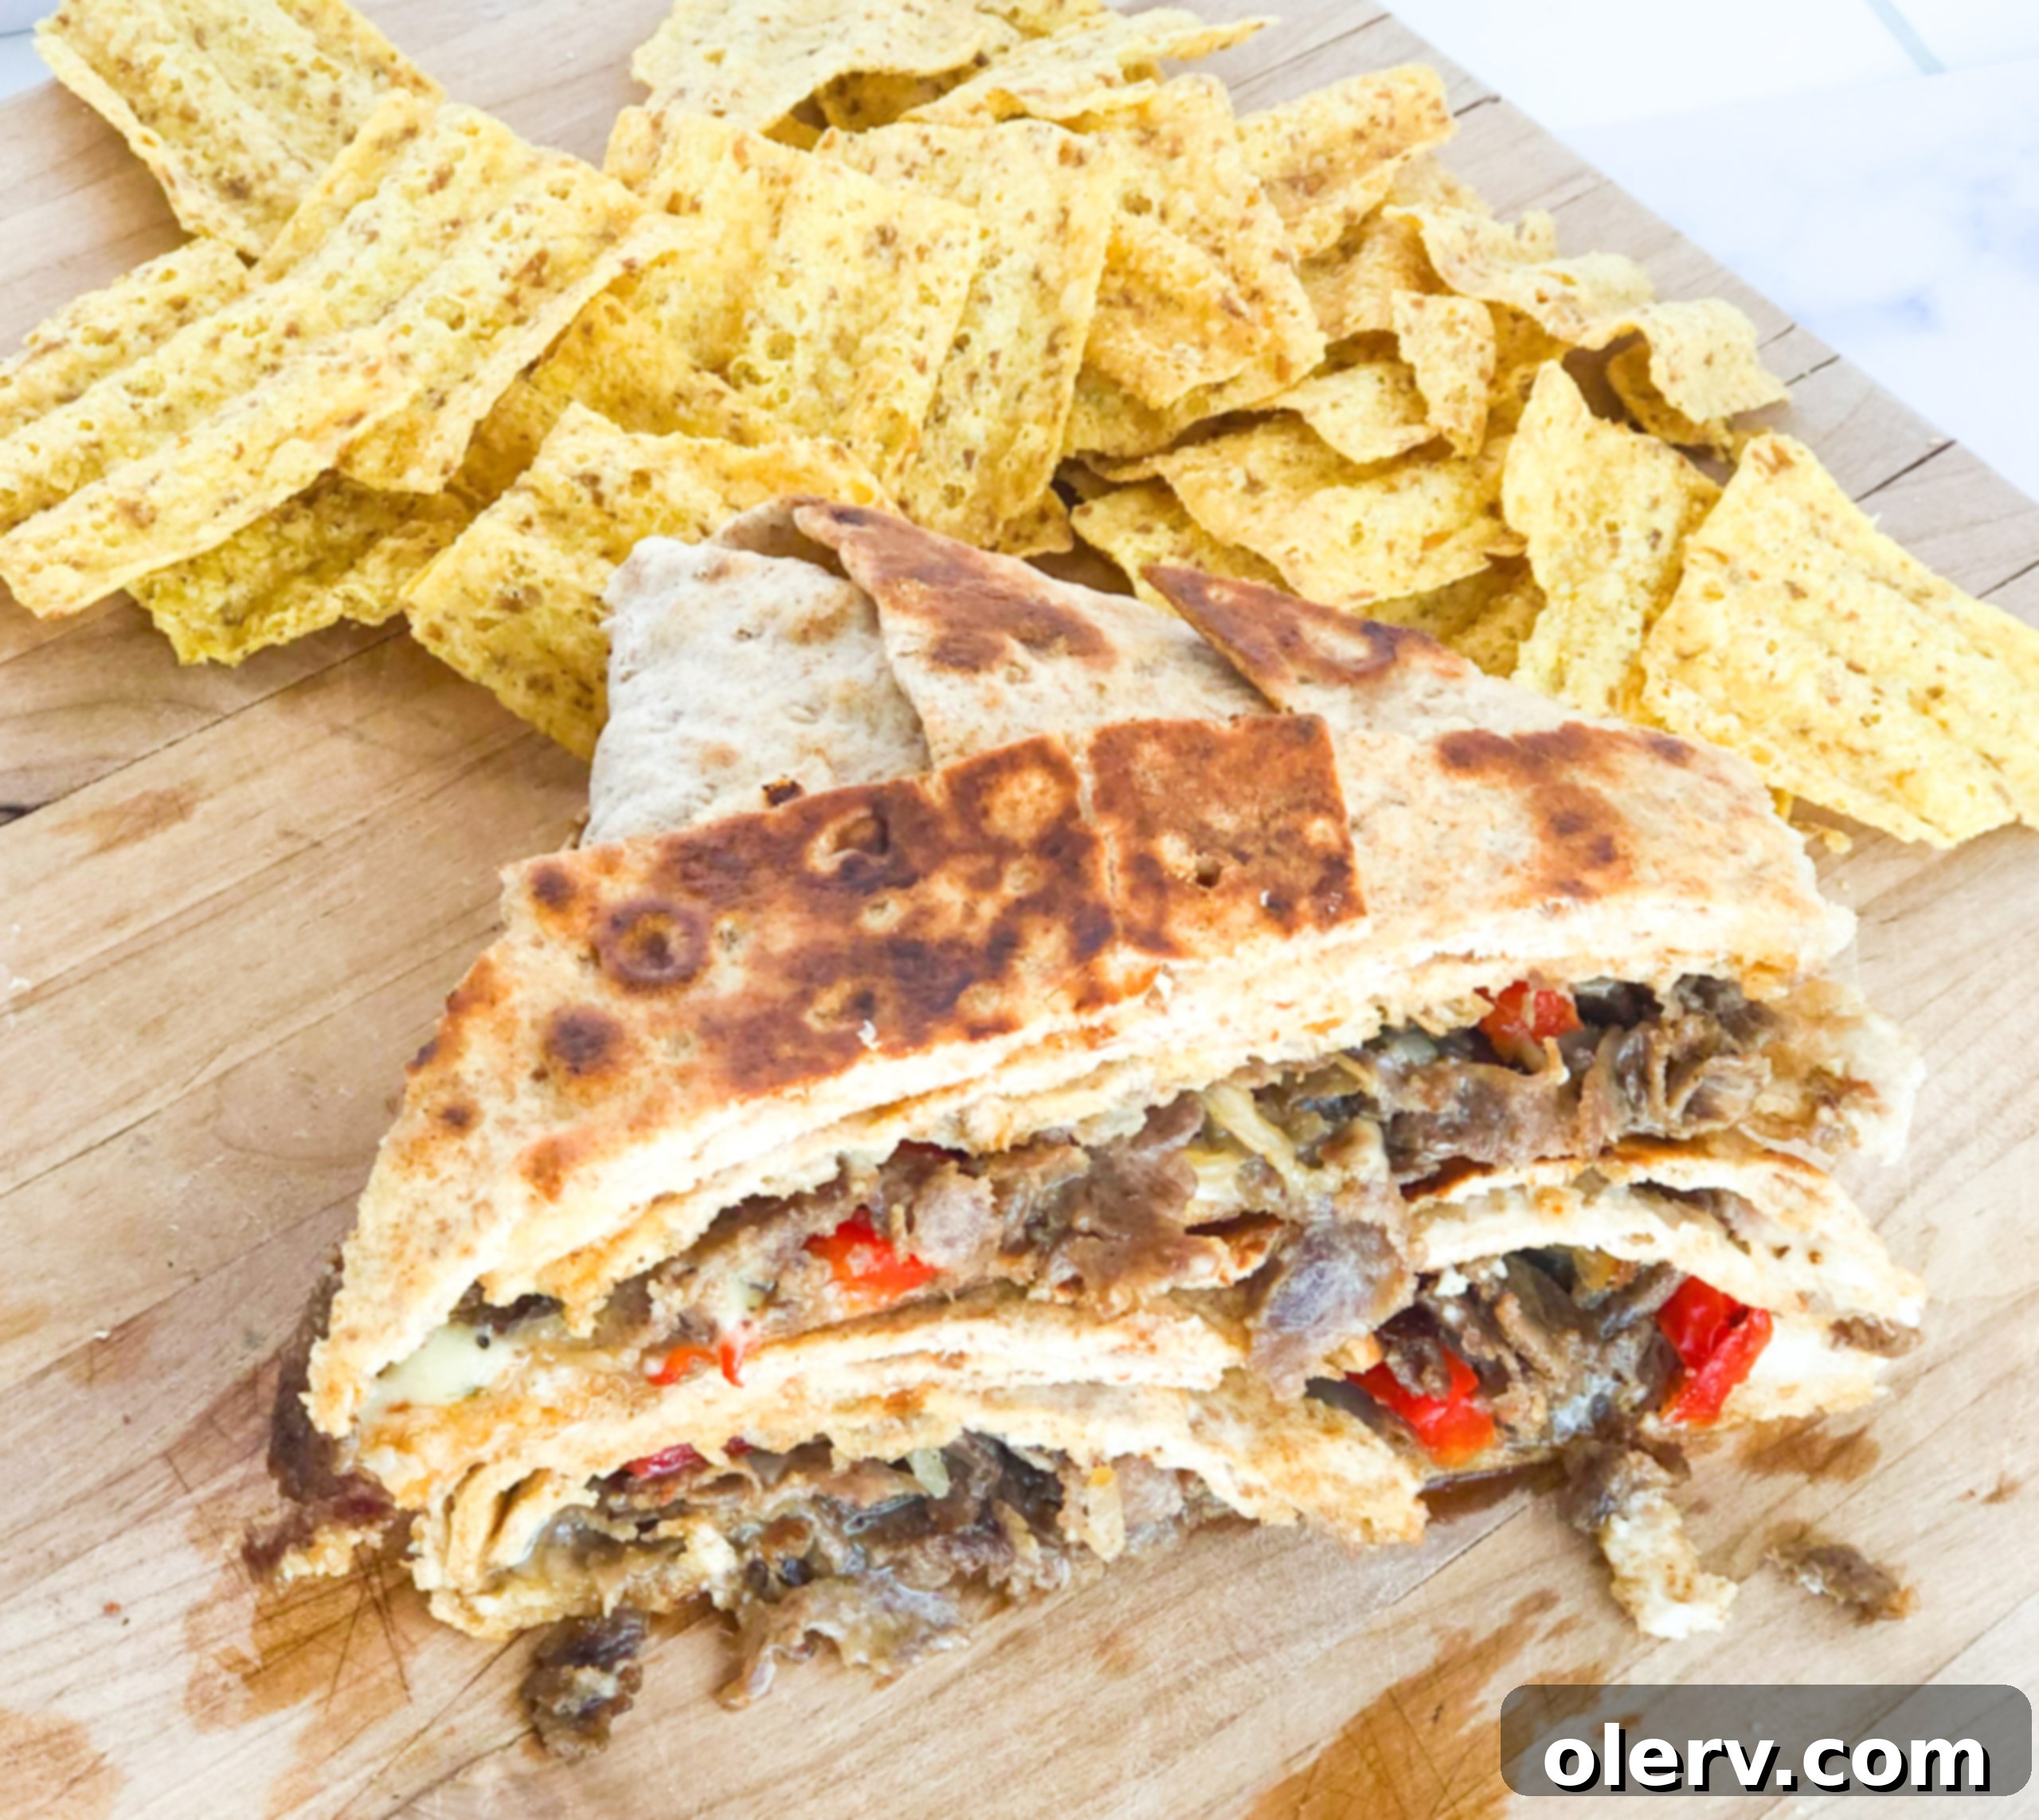
Ultimate Philly Cheesesteak Crunch Wrap Recipe: Your New Favorite Easy Meal
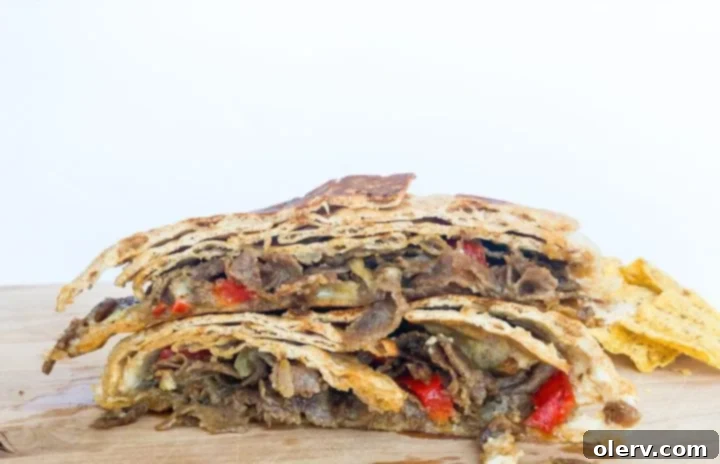
Prepare to revolutionize your weeknight dinners with a culinary sensation that’s as simple to make as it is incredibly delicious: the Philly Cheesesteak Crunch Wrap! These delightful creations are the latest craze in easy, customizable meals, and for good reason. Imagine all the mouth-watering flavors of a classic Philly cheesesteak – thinly sliced, savory steak, perfectly sautéed onions and bell peppers, and rich, gooey melted cheese – all expertly wrapped in a large, pliable lavash wrap and toasted to golden-brown perfection. The result? A perfectly portable, crunchy-on-the-outside, warm-and-melty-on-the-inside masterpiece that your entire family will absolutely adore.
This recipe goes beyond mere convenience; it offers a fantastic blend of textures and tastes, making every bite an exciting experience. Whether you’re a long-time fan of the traditional Philly cheesesteak or new to the crunch wrap phenomenon, this fusion dish is guaranteed to impress. It’s an ideal solution for busy evenings, fun gatherings, or simply when you’re craving something truly satisfying. Join me as we explore how to make this phenomenal Philly Cheesesteak Crunch Wrap and add a new favorite to your recipe collection!
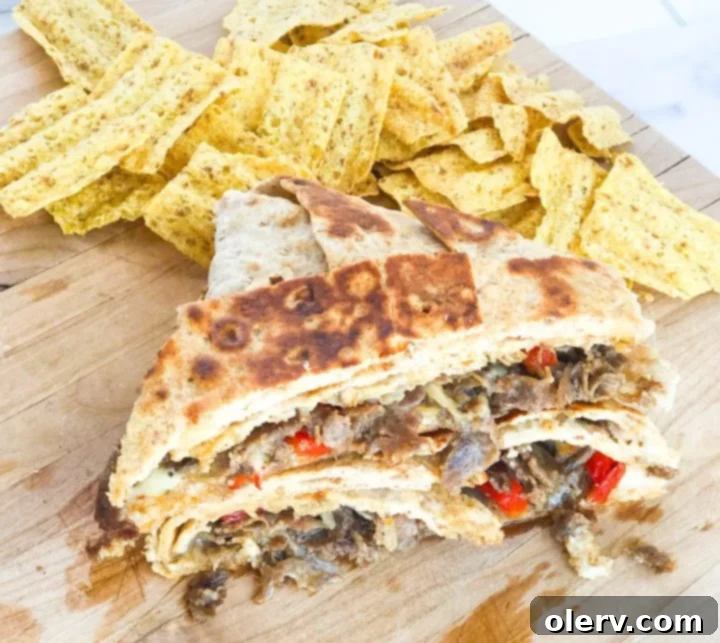
What Exactly is a Crunch Wrap and Why Are They So Popular?
The concept of the “crunch wrap” rose to prominence thanks to the iconic Taco Bell Crunchwrap Supreme, which ingeniously combined cheesy beef, crispy tostada shells, and fresh toppings all folded into a grilled tortilla. This innovative fast-food item quickly became a legend, sparking inspiration for countless homemade variations. Today, the term “crunch wrap” signifies a versatile and exciting approach to meal preparation, allowing for endless flavor combinations and even healthier adaptations. It’s a testament to how a simple idea can evolve into a beloved culinary trend.
Essentially, a homemade crunch wrap involves taking a large, soft wrap – typically a lavish wrap or a large flour tortilla – and generously filling its center with various delicious ingredients. A key element is often a crispy component, such as a smaller tortilla, tostada, or even crushed tortilla chips, which is placed inside to ensure that signature “crunch” in every bite. The filled wrap is then carefully folded into a neat, self-contained pocket. This sealed package is then toasted on a hot griddle or frying pan until its exterior turns golden brown and delightfully crispy, while the internal fillings become warm, melty, and incredibly flavorful. It’s this delightful contrast of textures – a satisfying crunch on the outside and a warm, gooey interior – that makes homemade crunch wraps so irresistibly appealing. My family, for instance, has become absolutely obsessed with these Philly Cheesesteak Crunch Wraps, and I’m confident yours will too!
The Perfect Fusion: Why a Philly Cheesesteak Crunch Wrap?
Combining the beloved elements of a traditional Philly cheesesteak with the innovative format of a crunch wrap creates a truly exceptional and deeply satisfying meal. The classic Philly cheesesteak is revered for its robust flavors: tender, thinly sliced beef, often ribeye or sirloin, expertly cooked with sweet sautéed onions and bell peppers, all brought together with a generous amount of melted cheese. Encapsulating this iconic flavor profile within a crispy, portable crunch wrap offers several compelling advantages:
- Unmatched Flavor Profile: All the rich, savory, and umami notes of the steak, the subtle sweetness of the caramelized vegetables, and the creamy tang of the cheese are concentrated and celebrated within each bite.
- Superior Texture: The exterior of the lavash wrap toasts to a magnificent crisp, providing a delightful textural counterpoint to the soft, tender steak and gooey melted cheese inside. This interplay of textures is a highlight of this crunch wrap recipe.
- Portability and Ease: Unlike a traditional cheesesteak sandwich, which can sometimes be messy to eat, the crunch wrap’s folded design makes it perfectly contained and easy to handle, whether you’re enjoying it at the dinner table or on the go. This makes it an excellent choice for a quick and easy dinner.
- Customization Potential: While this recipe focuses on classic Philly ingredients, the crunch wrap format allows for endless personalizations. Adjust the spice level, swap cheeses, or add extra vegetables to suit your preference.
- Family-Friendly Appeal: The novelty and deliciousness of a homemade crunch wrap make it an instant hit with both kids and adults, easily becoming a staple in your rotation of family dinner ideas.
This fusion truly takes comfort food to the next level, offering a unique and incredibly satisfying experience that’s both familiar and exciting.
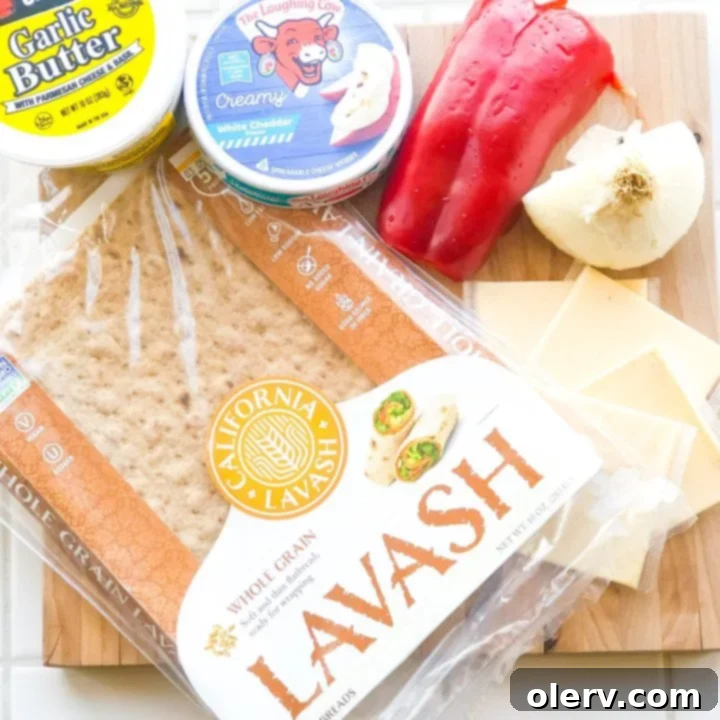
Essential Ingredients for Your Homemade Philly Cheesesteak Crunch Wrap
Crafting the perfect Philly Cheesesteak Crunch Wrap begins with selecting quality ingredients that contribute to its authentic flavor and satisfying texture. Here’s a detailed look at what you’ll need and some tips for sourcing:
Sourcing Your Wraps: Lavash vs. Tortillas
The choice of wrap is crucial for achieving that signature crunch and ease of folding. Lavash wraps are my top recommendation for this recipe due to their unique properties. Their rectangular shape and thin, flexible texture make them incredibly easy to fold into a tight, secure pocket, and they crisp up beautifully when toasted. This results in a superior crunch and a less doughy feel compared to thicker tortillas.
So, where can you buy lavish wraps? You can often find them in the bakery section, international aisle, or near the deli section of larger supermarkets. My go-to brands are often available at specialty grocers like Dick’s Market. Trader Joe’s is also a reliable source for good quality lavash wraps, and even many Walmart locations carry them in their specialty bread or international foods section. For those who prefer online shopping, brands like Cut Da Carb offer excellent lavash wraps that can be conveniently delivered to your home. If lavish wraps are not available in your area, don’t worry! A large, thin flour tortilla (the kind typically used for burritos) can work as a suitable alternative. You might need to overlap two slightly or use a small piece of another tortilla to cover any gaps in the center if your fillings are particularly generous, ensuring everything stays tucked inside during cooking.
The Heart of the Meal: Thinly Sliced Philly Meat
For that authentic Philly cheesesteak experience, the quality and preparation of your beef are paramount. Thinly sliced ribeye steak is traditionally considered the gold standard for its rich marbling and tender texture, which becomes incredibly flavorful when cooked. However, thinly sliced sirloin or even pre-shaved steak (often found in the freezer section of your grocery store) can also yield fantastic results. The key is extreme thinness, which allows the meat to cook quickly and achieve that classic, melt-in-your-mouth texture. Don’t hesitate to ask your local butcher to thinly slice your chosen cut of beef for you.
The Perfect Cheese Combination for Creaminess and Flavor
- Laughing Cow Cheese Wedges: This is a secret ingredient that truly elevates the Philly Cheesesteak Crunch Wrap. Spreading a Laughing Cow cheese wedge across the lavish wrap before adding other fillings creates an incredibly creamy, tangy base. It melts beautifully, acts as a delicious binder for your ingredients, and adds a subtle richness that prevents the wrap from being dry. Trust me, it’s a game-changer!
- Pepper Jack Cheese: While Provolone or American cheese are common in traditional cheesesteaks, I find that Pepper Jack cheese adds a wonderful, mild spicy kick and melts into a gloriously gooey consistency. If you prefer a milder flavor, feel free to substitute with classic Provolone, Muenster, or even a good quality sharp white cheddar for a different dimension of flavor.
Aromatic Vegetables: Peppers, Onions, and Mushrooms
No proper Philly cheesesteak is complete without its signature sautéed vegetables. Thinly sliced bell peppers (green bell peppers are traditional, but a mix of colors adds visual appeal and a slightly sweeter flavor), onions, and optional chopped mushrooms are essential. Sautéing these until they are tender, slightly caramelized, and aromatic builds a crucial layer of flavor and texture that complements the steak perfectly.
The Flavor Enhancer: Garlic Butter
Using garlic butter for both cooking your steak and vegetables and toasting your wrap adds a profound layer of savory, aromatic flavor. It not only contributes to the delicious taste but also helps achieve that desirable golden-brown and crispy crust on your crunch wrap.
Step-by-Step: Crafting Your Delicious Philly Cheesesteak Crunch Wrap
Ready to bring this amazing Philly Cheesesteak Crunch Wrap recipe to life? Follow these detailed instructions for a perfectly cooked, incredibly flavorful meal. This guide will ensure your homemade crunch wraps are crispy on the outside and gooey on the inside every time!
Step 1: Prepare Your Philly Steak and Vegetables
Begin by preparing the heart of your crunch wrap. In a large, sturdy frying pan or skillet, melt 1 tablespoon of garlic butter over medium-high heat. Once melted and shimmering, add your thinly sliced Philly steak. Sauté the steak, breaking it up with a spatula as it cooks, until it is thoroughly browned and cooked through. Next, add the thinly sliced bell peppers, onions, and the optional chopped mushrooms to the pan with the steak. Continue to cook for an additional 2-3 minutes, stirring occasionally, until the vegetables are tender-crisp and have developed a slight caramelization. Once the filling is cooked to perfection, remove the entire steak and vegetable mixture from the pan and transfer it to a bowl. Set it aside, but keep your frying pan on the heat – you’ll be using it again shortly to toast your wraps.
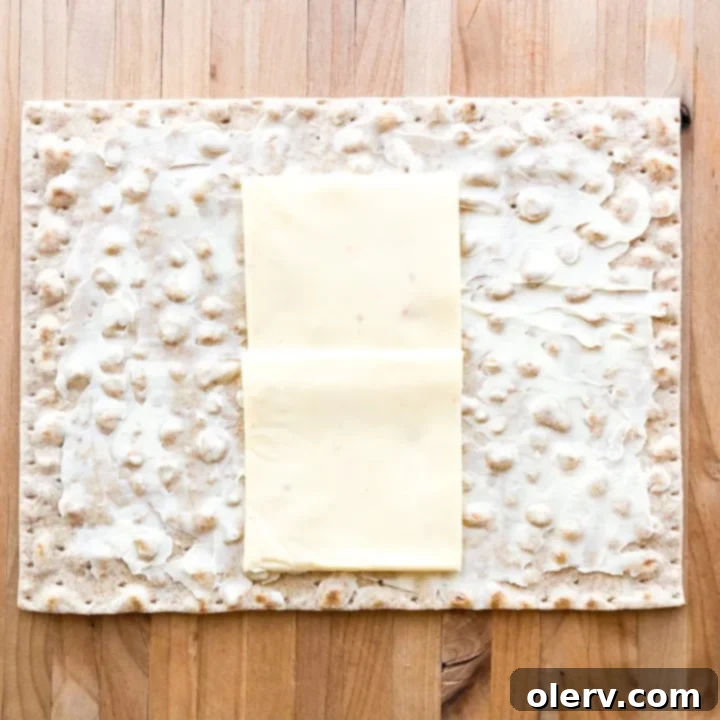
Step 2: Assemble the Wrap – The Foundation
Lay one large lavish wrap flat on a clean, dry surface, such as a cutting board or a clean countertop. Take one wedge of Laughing Cow cheese and, using a knife or the back of a spoon, spread it evenly across the entire surface of the wrap, reaching close to the edges. This layer not only adds a wonderful creamy texture and tangy flavor but also helps to moisten the wrap, making it easier to fold and adhere to itself, creating a more secure pocket.
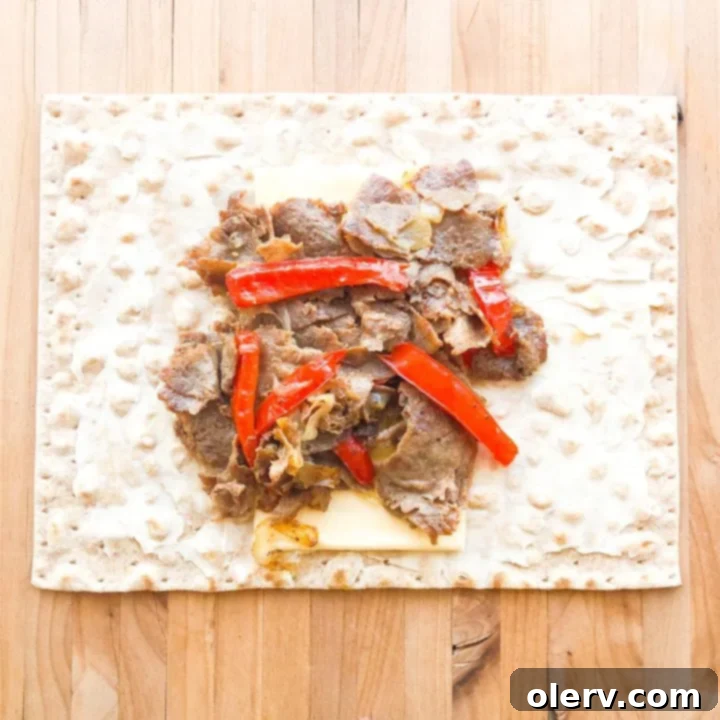
Step 3: Layer the Delicious Filling
Now, it’s time to add the star of the show. In the very center of the lavish wrap, on top of the Laughing Cow cheese layer, place two slices of your chosen cheese (e.g., Pepper Jack). Layering the slices of cheese at this point ensures maximum meltiness and distribution throughout your filling. Next, spoon approximately half of your prepared Philly steak and vegetable mixture directly on top of the cheese slices. Be mindful to keep the filling somewhat centralized, leaving a clear border around the edges of the wrap – this space is essential for a clean and secure fold.
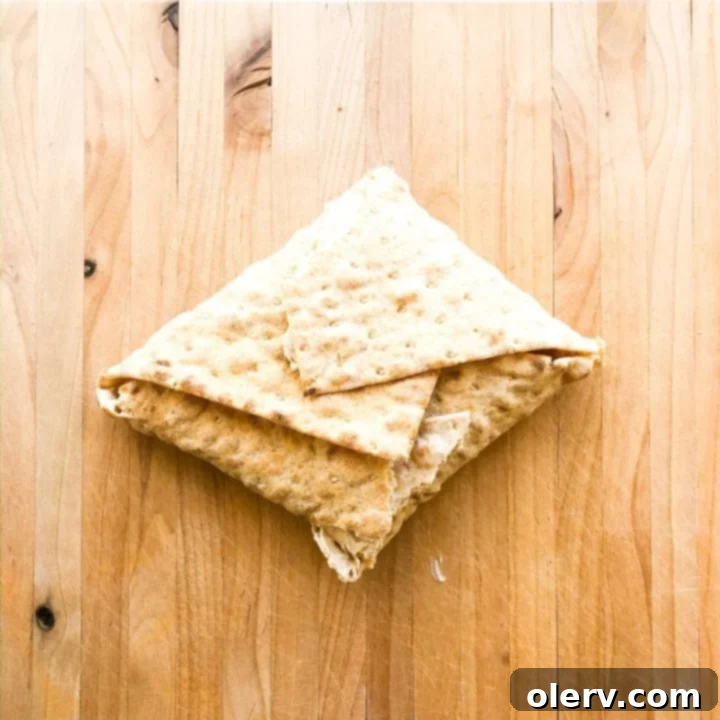
Step 4: The Art of Folding Your Crunch Wrap
This is where the “wrap” in crunch wrap truly comes to life! Carefully bring one corner of the lavish wrap towards the center, folding it snugly over a portion of the filling. Gently press down to help it adhere. Continue this process, bringing each subsequent corner towards the center and overlapping the previous fold, working your way around the filling. The goal is to fully enclose all the delicious ingredients, creating a tight, sealed, and somewhat hexagonal or octagonal pocket. Ensure there are no major gaps, as a well-sealed wrap will prevent filling from escaping and help achieve an even toast.
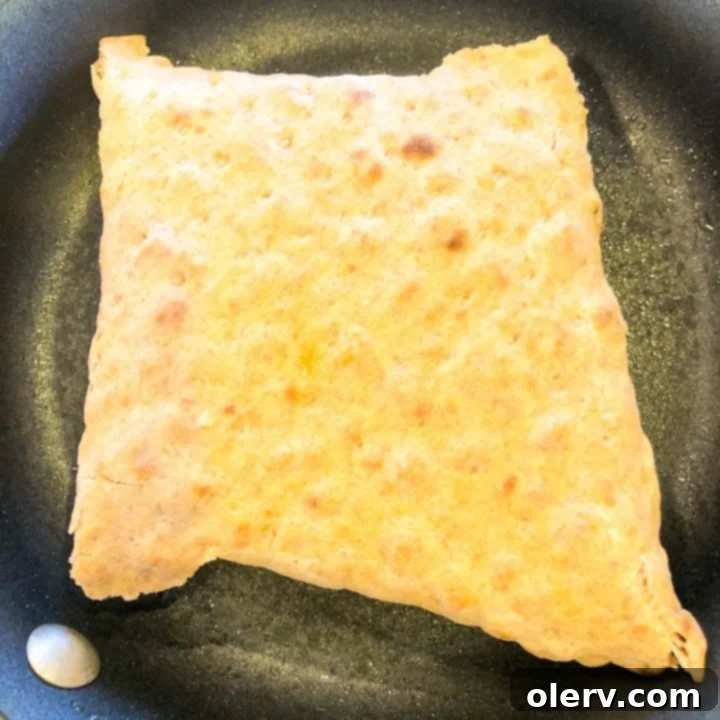
Step 5: Toast to Golden Perfection
Add the remaining 1 tablespoon of garlic butter to your now hot frying pan. Once melted, carefully place your first folded crunch wrap into the pan, ensuring the seam-side is facing down. This crucial step helps to seal the folds and prevents the wrap from unraveling during cooking. Cook for 1-2 minutes over medium heat, or until the bottom is beautifully golden brown and crispy. Using a wide, sturdy spatula, carefully flip the crunch wrap and toast the other side for another 1-2 minutes until it’s equally golden and crunchy. By this point, the cheese inside should be perfectly melted and gloriously gooey. Remove the first crunch wrap from the pan. Repeat the entire assembly and toasting process (Steps 2-5) for your second Philly Cheesesteak Crunch Wrap.
Step 6: Serve Immediately and Enjoy!
Once both sides of your crunch wraps are a magnificent golden brown and the interior cheese is bubbling and melted, remove them from the pan. Serve them immediately while hot to savor the perfect combination of crispy exterior and warm, flavorful filling. You can slice them in half diagonally to showcase the incredible layers inside, or simply enjoy them whole. Be cautious, as the filling will be hot, but the burst of flavor will be absolutely worth it!
Tips for Achieving the Perfect Crispy Crunch Wrap Every Time
To ensure your homemade crunch wraps turn out perfectly crispy and delicious, keep these expert tips in mind:
- Don’t Overfill: While it’s tempting to pack in as much filling as possible, overfilling can make it difficult to fold the wrap securely and may cause it to tear. Aim for a generous but manageable amount that allows for a tight seal.
- Maintain Medium Heat: Resist the urge to crank up the heat. Medium heat is ideal for toasting the wrap slowly and evenly. This prevents burning the exterior while allowing enough time for the interior cheese to melt perfectly and the fillings to warm through.
- Use a Non-Stick Pan: A good quality non-stick frying pan or griddle is essential. It will make toasting and flipping your crunch wraps much easier, preventing them from sticking and ensuring a uniform golden crust.
- Gentle Pressure is Key: While toasting, a gentle press with your spatula on the top of the crunch wrap can help ensure maximum contact with the hot pan. This promotes even browning and a crispier exterior.
- Pre-cook All Fillings: Remember that the toasting step is primarily for crisping the wrap and melting the cheese. All your main fillings, especially the steak and harder vegetables, should be fully cooked before you begin assembling your wrap.
- Moisture Control: Ensure your cooked filling isn’t excessively watery. If there’s too much liquid, it can make the wrap soggy instead of crispy. Drain any excess liquid from the steak and veggie mixture before adding it to the wrap.
Creative Variations and Delicious Serving Suggestions
While this Philly Cheesesteak Crunch Wrap recipe is a masterpiece on its own, the beauty of crunch wraps lies in their versatility. Don’t hesitate to get creative and customize your fillings to suit your taste!
- Protein Power-Ups: Experiment with other proteins like grilled chicken, ground turkey, seasoned ground beef, or even a plant-based meat alternative for a different spin. Try a BBQ chicken crunch wrap or a spicy chorizo crunch wrap!
- Cheese Adventures: Beyond Pepper Jack, explore other melty cheeses such as smoked gouda, Monterey Jack, colby, or a sharp cheddar for varying flavor profiles. You could even blend cheeses!
- Spice It Up: For those who love a bit of heat, add a pinch of red pepper flakes to your steak mixture, a dash of hot sauce before folding, or include thinly sliced jalapeños.
- Extra Crunch: To mimic the original Taco Bell version, place a small, crispy corn tostada or a handful of slightly crushed tortilla chips inside the wrap, directly on top of your main filling, before folding.
- Vegetable Boost: Incorporate finely chopped spinach, corn, black beans, or roasted red peppers for added nutrients, color, and flavor. A touch of fresh cilantro can also brighten the flavors.
- Sauce It Up: Drizzle your crunch wrap with a bit of sriracha mayo, a garlic aioli, a zesty chipotle sauce, or even a simple ranch dressing before serving for an extra layer of flavor.
Serve your crispy Philly Cheesesteak Crunch Wraps with classic accompaniments like crispy french fries, a fresh green salad with a light vinaigrette, or a warm cup of your favorite tomato soup for a complete and incredibly satisfying meal. They’re also fantastic with a side of coleslaw or some fresh salsa.
Storing and Reheating Your Delectable Crunch Wraps
While these Philly Cheesesteak Crunch Wraps are undoubtedly at their best when enjoyed fresh and hot, you can certainly prepare them ahead or save any leftovers for later! Allow your cooked crunch wraps to cool completely to room temperature. Once cooled, wrap each individually in plastic wrap or aluminum foil, then place them in an airtight container. They can be stored in the refrigerator for up to 2-3 days.
To reheat and bring back that wonderful crispiness, avoid the microwave if possible. The best methods for maintaining a desirable texture are:
- Toaster Oven or Air Fryer: Place the crunch wraps directly in a toaster oven or air fryer preheated to 350°F (175°C). Heat for 8-12 minutes, flipping halfway through, until they are warmed through and the exterior is re-crisped.
- Frying Pan: Heat a dry frying pan over medium heat. Place the crunch wraps in the pan and cook for 3-5 minutes per side, or until thoroughly heated and crispy on both sides.
While microwaving is the quickest option (1-2 minutes), it will result in a softer wrap rather than a crispy one. For the optimal crunch wrap experience, a dry heat method is highly recommended.
Don’t Miss Out! Pin This Amazing Recipe for Later!
This Philly Cheesesteak Crunch Wrap is more than just a meal; it’s a testament to how simple ingredients can be transformed into something truly extraordinary. It’s comforting, hearty, incredibly satisfying, and perfect for a cozy family dinner or a fun gathering with friends. The ease of preparation combined with the explosion of amazing flavors makes this a recipe you’ll undoubtedly want to revisit again and again. Make sure to save this fantastic recipe so you can whip up these delicious crunch wraps whenever the craving strikes! You won’t regret adding this to your collection of easy dinner ideas.
Philly Cheesesteak Crunch Wrap
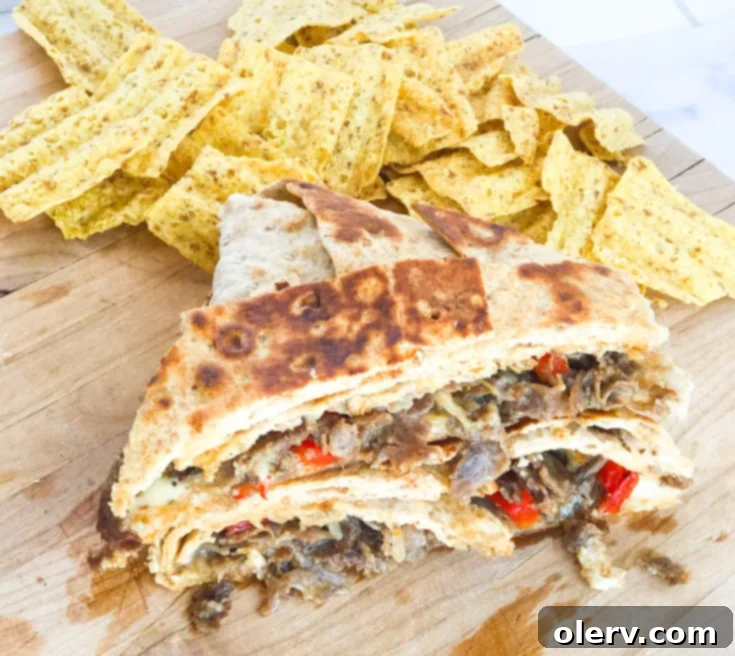
This incredible Philly Cheesesteak Crunch Wrap recipe brings together the classic flavors of a Philly cheesesteak with a satisfyingly crispy wrap. It’s an easy, delicious, and customizable meal perfect for any occasion!
5 minutes
5 minutes
10 minutes
Ingredients
- 2 tablespoon garlic butter, divided
- 8 ounces thinly sliced Philly steak (ribeye or sirloin preferred)
- 1/2 cup thinly sliced bell peppers (green or mixed colors)
- 1/2 cup thinly sliced onion
- Optional: 1/4 cup chopped mushrooms
- 2 large lavish wraps
- 2 wedges Laughing Cow cheese
- 4 slices pepper jack cheese (or provolone/American)
Instructions
- In a frying pan over medium-high heat, melt 1 tablespoon of garlic butter. Add the thinly sliced Philly steak and sauté until browned, breaking it up with a spatula.
- Next, add the bell peppers, onions, and optional mushrooms to the pan with the steak. Cook for an additional 2-3 minutes until vegetables are tender-crisp. Remove the entire mixture from the pan and set aside. Keep the pan on the heat.
- Lay out one lavish wrap and spread 1 Laughing Cow cheese wedge evenly across its surface.
- Place 2 slices of pepper jack cheese in the center of the wrap, then spoon half of the prepared steak and vegetable mixture on top, keeping it centered.
- Carefully fold the corners of the lavish wrap towards the center, one at a time, overlapping them to create a tight, sealed pocket, fully enclosing the filling.
- Repeat steps 3-5 with the second lavish wrap and the remaining ingredients to prepare the second crunch wrap.
- In the hot frying pan, add the final tablespoon of garlic butter. Place the first folded crunch wrap into the pan, seam-side down. Cook for 1-2 minutes until golden and crispy, then flip and toast the other side for another 1-2 minutes. Repeat with the second crunch wrap. Serve immediately and enjoy!
