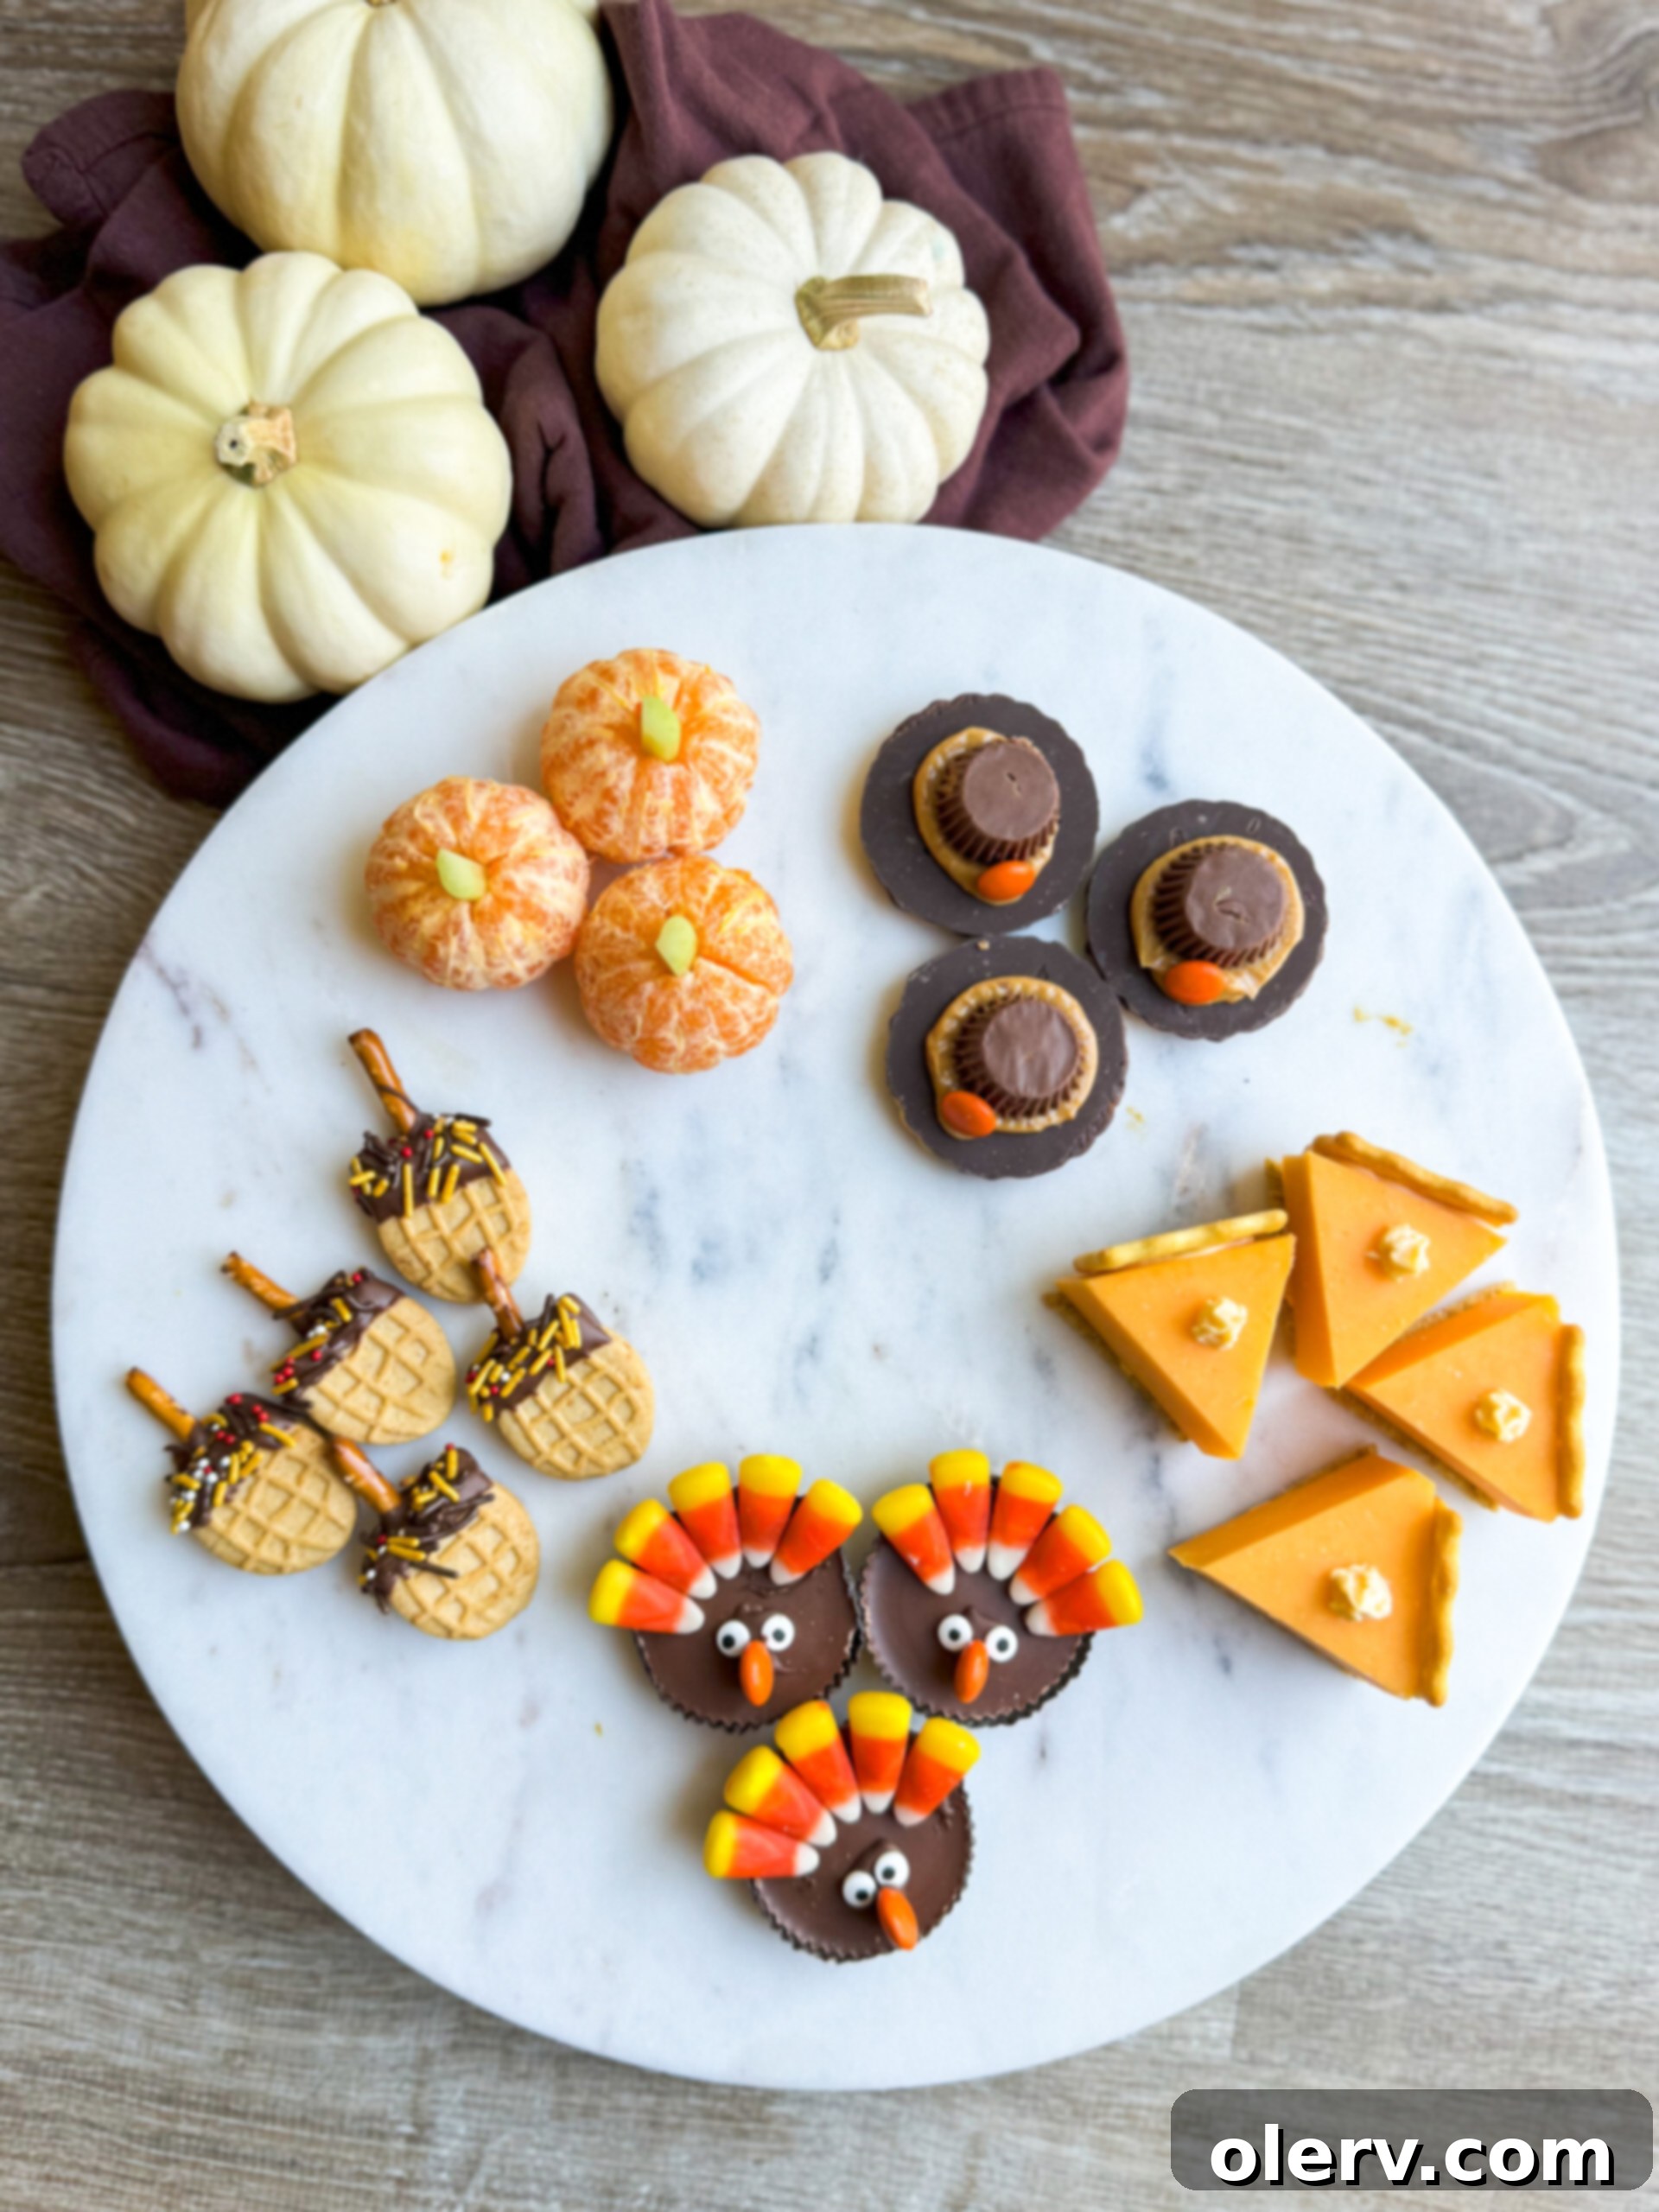
Delightful Tiny Thanksgiving Treats: Perfect Portions for Festive Fun
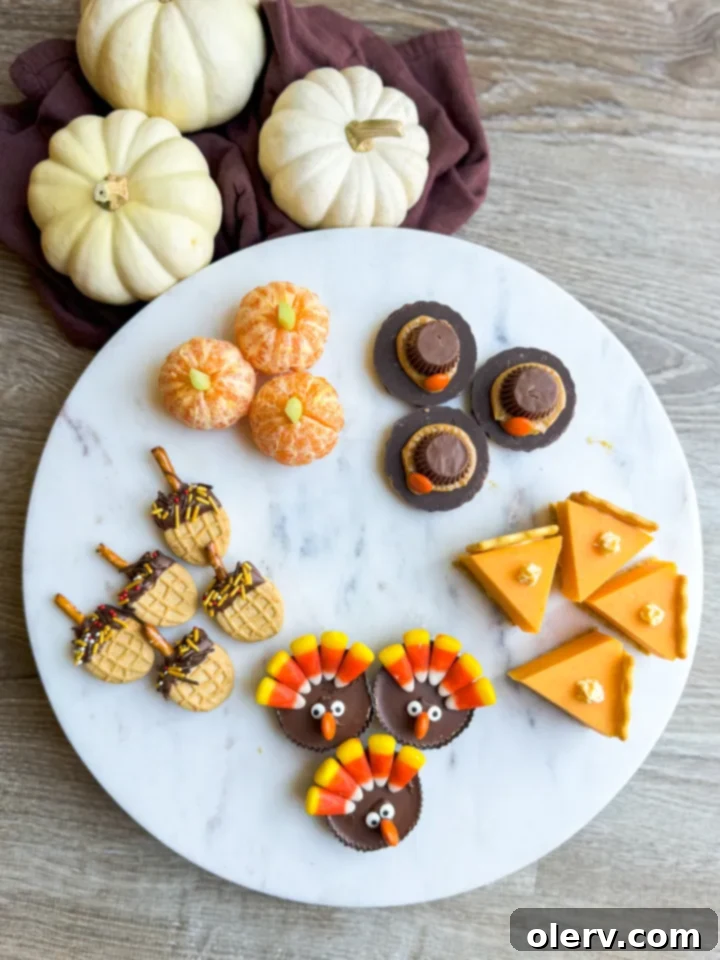
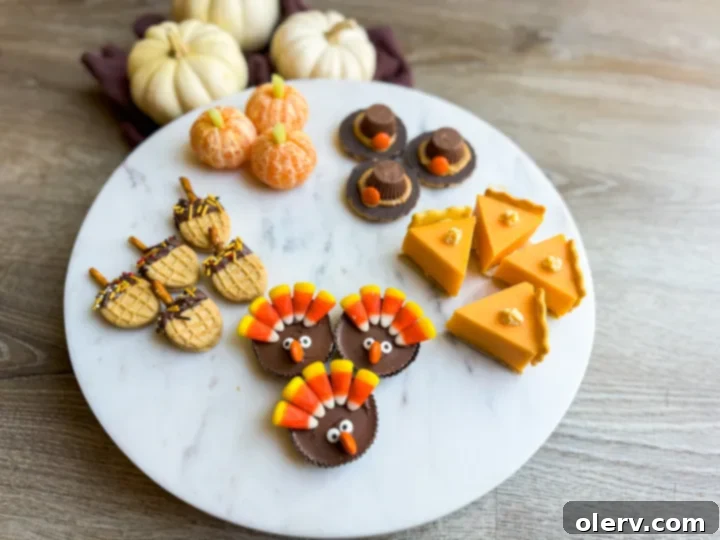
Thanksgiving is a time for feasting, family, and gratitude. While the traditional spread is undeniably delicious, sometimes a full slice of pie or a large dessert feels overwhelming after a grand meal. This is where the magic of **Tiny Thanksgiving Treats** truly shines! These perfectly portioned delights, ranging from charming pumpkin cuties to whimsical chocolate turkeys, offer a fantastic way to indulge in a bit of everything without feeling overly stuffed. Mini desserts are the ultimate crowd-pleaser, providing the perfect compromise for guests who desire a small, sweet nibble of various holiday flavors. Beyond satisfying adult palates, they offer an incredibly easy and fun option for toddlers and little kids to get actively involved in the festive fun, making the holiday even more memorable for everyone.
Imagine a spread where every dessert is a miniature masterpiece, allowing everyone to sample multiple options. From savory-sweet combinations to pure sugary bliss, these bite-sized wonders ensure that no one misses out on their favorite holiday flavors. They’re also fantastic for portion control, helping guests enjoy the holiday bounty responsibly. Plus, the sheer adorableness of mini treats adds an extra layer of charm to your Thanksgiving dessert table, sparking joy and conversation.
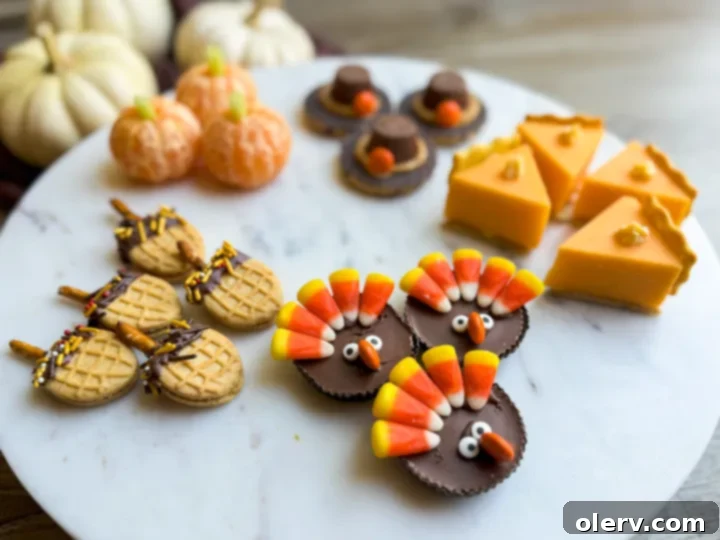
Crafting a Memorable Toddler Thanksgiving Treats Table
Do you traditionally set up a separate, dedicated table for the children during your Thanksgiving dinner? Many families find this a wonderful tradition, and it’s certainly one I embrace! This year, make the **toddler turkey table** the ultimate destination for fun and deliciousness. These Thanksgiving mini treats are designed to kick off the “turkey party” for your youngest guests, giving them free rein over their very own festive spread.
There are two fantastic approaches to setting up this special kids’ table. The first option is to prepare a selection, or even all, of the delightful treats mentioned in this guide beforehand. Arrange them artfully on your little table, inviting guests of all ages, but especially the kiddos, to enjoy and indulge at their leisure. This approach is perfect for busy hosts who want to offer a beautiful, ready-made spread.
Alternatively, for a truly engaging experience, you can set out all the individual ingredients for these tiny Thanksgiving treats and let those creative toddlers become little chefs at their table! This hands-on activity encourages imagination and fine motor skills. While some supervision might be needed, each child can craft and personalize their own adorable Thanksgiving creations. It’s an excellent way to keep them entertained and make them feel like an integral part of the holiday preparations. This interactive setup transforms the kids’ table from just a dining spot into a vibrant craft and snack station.
Regardless of whether you choose the pre-made or DIY route, the goal is to create a festive and welcoming space where children can enjoy their holiday treats in a way that feels special and tailored just for them. These tiny treats are perfectly sized for small hands and mouths, reducing mess and making snack time a breeze. They also provide a sense of independence, allowing kids to choose and assemble their own snacks, fostering a positive relationship with food and holiday traditions.
Festive Pumpkin Pie Cheese & Crackers
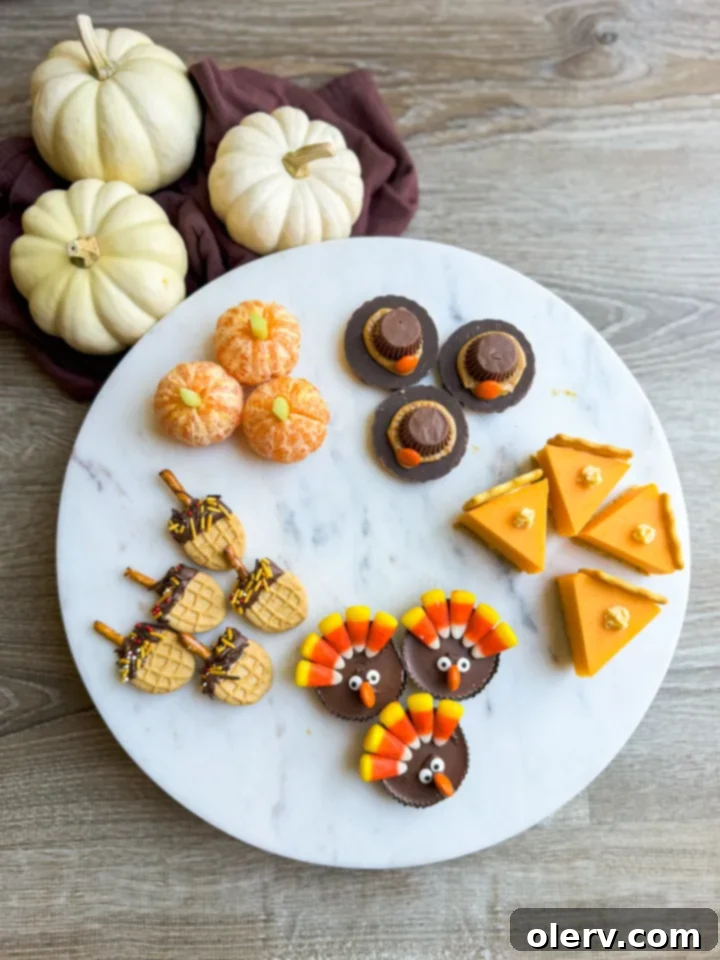
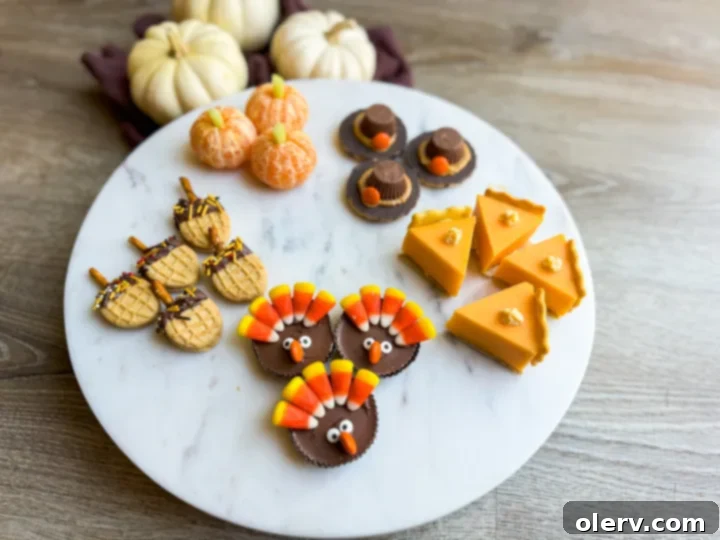
The first brilliant idea for our array of tiny turkey day treats is these utterly adorable **cheese pumpkin pies**! These savory-sweet bites are not only charming but also incredibly simple to assemble, making them a fantastic appetizer or snack for any age. They bring the iconic shape of Thanksgiving pie to a delightful, bite-sized form using everyday ingredients. Here’s what you’ll need to make them, along with some tips for perfection:
- Chicken & a Biscuit Crackers (for a savory crust texture)
- Triangle Triscuits (or similar triangle-shaped crackers for the “filling”)
- Cheddar Cheese (block cheese works best for cutting)
- Spray Cheese (for easy assembly and a creamy topping)
To craft these mini masterpieces, begin by preparing your cheddar cheese. Slice the block of cheddar into thin, small triangle wedges. These will form the “pumpkin pie filling.” Next, carefully place each cheddar triangle wedge onto a Chicken & a Biscuit cracker, which will serve as the base and add a lovely, slightly salty “crust” flavor. Use a small dab of spray cheese as an edible adhesive to secure the cheddar to the cracker.
For the “crust” at the back of your mini pie, take another Chicken & a Biscuit cracker and gently break it or cut it to fit, then attach it to the back of the cheese triangle, again using the trusty spray cheese to hold it firmly in place. This gives the illusion of a pie crust peeking out. Finally, to “seal the deal” and add that signature whipped cream look, finish each cheese pumpkin pie with a delicate dollop of spray cheese right on top. These little creations are surprisingly sturdy and incredibly satisfying, offering a wonderful savory counterpoint to the sweeter treats on your holiday table.
Consider using different types of cheese for variety, such as Colby Jack or a mild white cheddar, to change up the flavor profile. You can also experiment with different cracker shapes or even toast thin bread rounds if you prefer a different base. These cheese and cracker pies are not just for kids; adults will appreciate their nostalgic charm and delicious simplicity too!
Crafting Charming Pilgrim Hats
Our second whimsical idea for tiny Thanksgiving treats involves creating these fun and iconic **pilgrim hats**! These sweet little edibles are incredibly simple to make and instantly recognizable, adding a touch of historical charm to your dessert spread. They are a delightful activity for kids to help with and an even more delightful treat to eat. Here’s what you’ll need to assemble them, along with a few helpful tips:
- Fudge Strip Cookies (the base of your hat)
- Peanut Butter (the edible “glue” and filling)
- Mini Reese’s Cups (the crown of the hat)
- Reese’s Pieces (the festive buckle)
To begin, take a Fudge Strip cookie and flip it upside down so the fudge-coated side with the stripes is facing down, forming the brim of your hat. Place a generous dollop of peanut butter right in the center of the cookie’s exposed side. This peanut butter serves as both an adhesive and a delicious addition to the treat. Next, firmly press a Mini Reese’s Cup onto the dollop of peanut butter; this will form the main body, or crown, of the pilgrim hat. The flat bottom of the Reese’s Cup should rest on the peanut butter.
To finish these charming hats, select a single orange Reese’s Piece. This will be the iconic buckle that adorns the front of the pilgrim hat. Gently press the orange Reese’s Piece onto the side of the Reese’s Cup, using a tiny bit of extra peanut butter if needed to ensure it sticks securely. Once assembled, these pilgrim hats are ready to be served! They are a fantastic combination of chocolate and peanut butter, making them an irresistible holiday snack.
For those with peanut allergies, consider using an alternative nut butter or a chocolate hazelnut spread. You could also use a dollop of melted chocolate or frosting as the adhesive if preferred. The key is to ensure the “glue” is firm enough to hold the Reese’s Cup in place once it sets. These pilgrim hats are not only a treat for the taste buds but also a visual delight, perfect for adding a playful element to your Thanksgiving table.
Adorable Chocolate Turkeys: A Sweet Holiday Treat
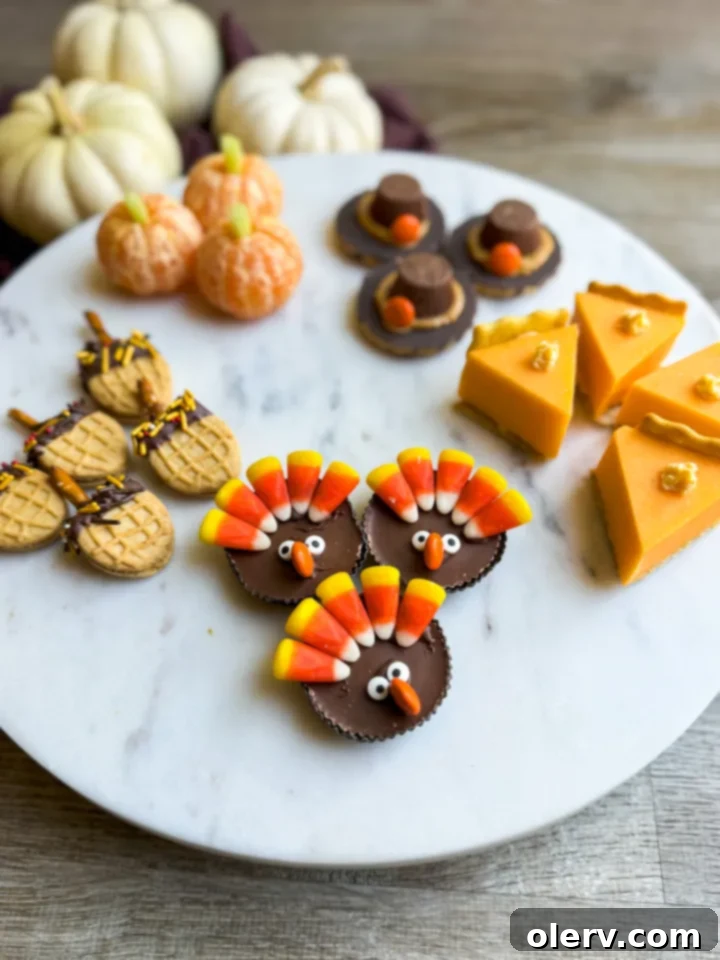
The third and arguably most iconic idea for our tiny turkey day treats is these absolutely adorable **chocolate turkeys**! These little creations are a holiday staple, bringing smiles to faces young and old. Combining the beloved flavors of peanut butter and chocolate with a festive candy twist, they are a must-have for your Thanksgiving dessert lineup. Here’s what you’ll need to make them, along with detailed instructions:
- Reese’s Peanut Butter Cups (the body of your turkey)
- Candy Corn (for the vibrant tail feathers)
- Edible Eyes (to bring your turkeys to life)
- Reese’s Pieces (for the beaks and waddles)
- Melting Chocolate (your essential edible adhesive)
Start by gently unwrapping your Reese’s Peanut Butter Cups, ensuring they remain intact. Next, prepare your melting chocolate. You can do this by melting chocolate chips or candy melts in a microwave-safe bowl in short intervals, stirring until smooth, or using a double boiler. Once your chocolate is melted and fluid, use a small spoon or a piping bag with a fine tip to apply a thin strip of melted chocolate along the top rim of the Reese’s Peanut Butter Cup. This will be where your turkey’s tail feathers attach.
While the chocolate is still soft, carefully stick several pieces of candy corn onto this chocolate strip, arranging them to fan out like colorful turkey feathers. Aim for 3-5 pieces, depending on the size of your Reese’s cup, for a full and vibrant tail. Once the feathers are in place, add a tiny bit more melted chocolate to the front-center of the Reese’s cup. This is where you’ll bring your turkey’s face to life. Gently press two edible eyes onto this chocolate. For the beak and wattle, choose a small orange or red Reese’s Piece and attach it just below the eyes with another dab of melted chocolate. Allow your chocolate turkeys to cool completely, either at room temperature or in the refrigerator, until the chocolate has set firm and all the components are securely in place.
These chocolate turkeys are not only delicious but also incredibly fun to make, making them a perfect activity for kids. The combination of sweet and salty is always a hit, and their festive appearance makes them a centerpiece on any dessert platter. You can experiment with different colored candy corn or small candies for the feathers, allowing for creative variations and personalized touches.
Cute Nutter Butter Acorns: A Fall Favorite
The fourth delightful idea for our tiny turkey day treats features these utterly cute **Nutter Butter acorns**! These treats perfectly capture the essence of autumn and Thanksgiving, combining the irresistible flavor of peanut butter cookies with a sweet chocolate and sprinkle topping. They’re surprisingly simple to make and look fantastic on any fall-themed platter. Here’s what you’ll need to create your own edible acorns:
- Nutter Butter Cookies (the base of your acorn)
- Melting Chocolate (for the “cap” of the acorn)
- Sprinkles (preferably fall-colored or chocolate jimmies for texture)
- Pretzel Sticks (for the tiny stem)
To start, carefully break each Nutter Butter cookie in half crosswise. The natural seam in the middle of the cookie makes this relatively easy. You’ll use one half of the cookie for each acorn. Next, melt your chocolate according to package directions (microwave or double boiler method). Once melted and smooth, dip the rounded top half of each broken Nutter Butter cookie into the melted chocolate. Ensure you get a nice, even coating that mimics the cap of an acorn. Immediately after dipping, sprinkle your chosen sprinkles generously over the wet chocolate. The sprinkles will adhere best when the chocolate is still warm and unset.
For the finishing touch, take a pretzel stick and break it into very small pieces, about half an inch long. Gently insert one of these small pretzel pieces into the top-center of the chocolate-dipped, sprinkle-covered cookie half. This forms the perfect little stem for your acorn. Once all your acorns are assembled, place them on parchment paper or a wire rack and allow the chocolate to cool and fully set. You can speed this up by placing them in the refrigerator for about 10-15 minutes. The firm chocolate will ensure they hold their shape beautifully.
These Nutter Butter acorns are a fantastic combination of salty and sweet, and their adorable appearance makes them a hit at any gathering. They’re also wonderfully sturdy, making them easy for little hands to pick up and enjoy. For a twist, try using white chocolate dyed with food coloring or different kinds of sprinkles, such as edible glitter for an extra sparkle. These treats embody the cozy spirit of the harvest season and are sure to be a beloved addition to your Thanksgiving spread.
Fresh & Fun Pumpkin Cuties
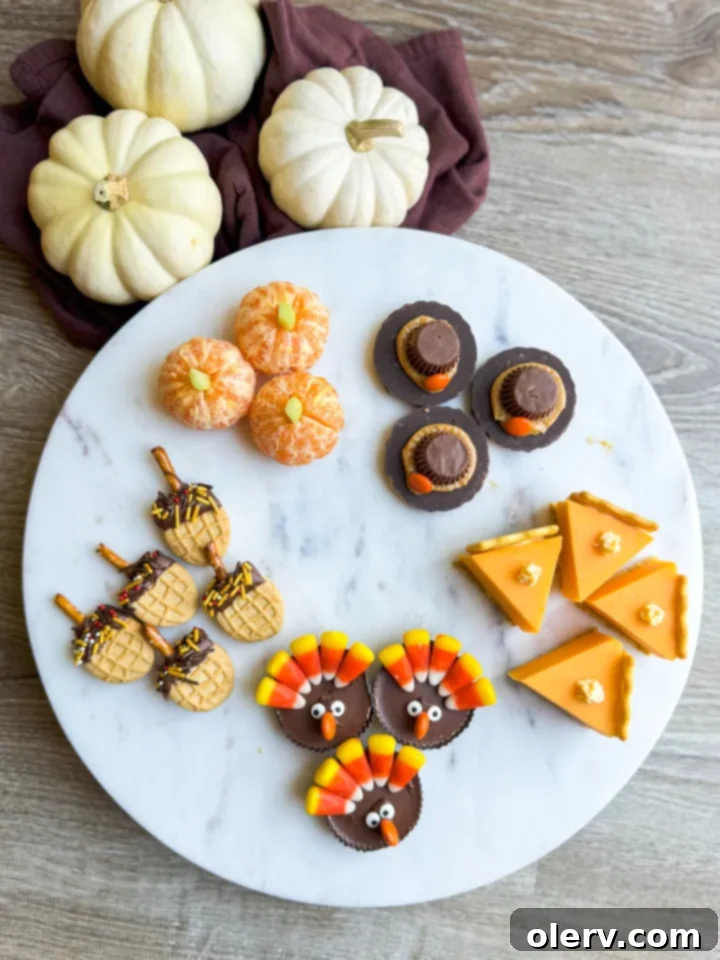
The fifth and final idea for our collection of tiny turkey day treats offers a wonderfully healthy and refreshing option: these incredibly easy **Pumpkin Cuties**! These are perfect for adding a touch of natural sweetness and color to your holiday spread, especially for those looking for a lighter alternative amidst the rich Thanksgiving dishes. They’re also naturally gluten-free and vegan, catering to a wider range of dietary needs. Here’s all you’ll need to make them, along with simple instructions:
- Cutie Oranges (or similar small, easy-to-peel mandarins/clementines)
- Celery (for the distinctive pumpkin stem)
Preparing these delightful little pumpkins couldn’t be simpler. First, carefully peel each Cutie orange. Aim for a clean peel that leaves the entire orange sphere intact. Once peeled, the vibrant orange color immediately evokes the image of a miniature pumpkin. Next, take your celery stalks and cut them into small, short pieces, roughly half an inch to an inch long. These pieces will serve as the realistic “stems” for your orange pumpkins. Gently insert one small piece of celery into the very center of the top of each peeled orange. The natural indentation where the stem was usually sits is the perfect spot.
And that’s it! In just a few moments, you have created a charming and nutritious treat that looks just like a tiny pumpkin. These pumpkin cuties are fantastic for cleansing the palate after heavier foods and provide a burst of fresh, citrusy flavor. They are particularly popular with younger children who appreciate their bright color and easy-to-handle size. Arranged on a platter, they add a beautiful, natural touch to your Thanksgiving decorations and offer a guilt-free indulgence.
For an extra festive flair, you can arrange them alongside the sweeter treats, creating a balanced display of holiday edibles. You might also try using small sprigs of fresh mint or rosemary instead of celery for an aromatic “stem,” or even adding a tiny dollop of Greek yogurt or cream cheese on top for a “whipped cream” effect if you want to make them a bit more decadent. These easy pumpkin cuties prove that holiday treats can be both adorable and wholesome, making them a winning addition to any Thanksgiving celebration.
Pin these Toddler’s Tiny Thanksgiving Treats to Pinterest to save them for later!
Creating these tiny Thanksgiving treats is a wonderful way to add joy, flavor, and engagement to your holiday celebrations. Whether you’re making them for a dedicated kids’ table or simply to offer a variety of bite-sized delights for all your guests, these recipes are easy, fun, and incredibly festive. From the savory charm of pumpkin pie cheese and crackers to the sweet appeal of chocolate turkeys and pilgrim hats, and the healthy simplicity of pumpkin cuties, there’s a mini treat for every taste and preference. Embrace the spirit of the season with these adorable, perfectly portioned morsels, and make your Thanksgiving table truly unforgettable!
Tiny Thanksgiving Treats – Chocolate Turkeys
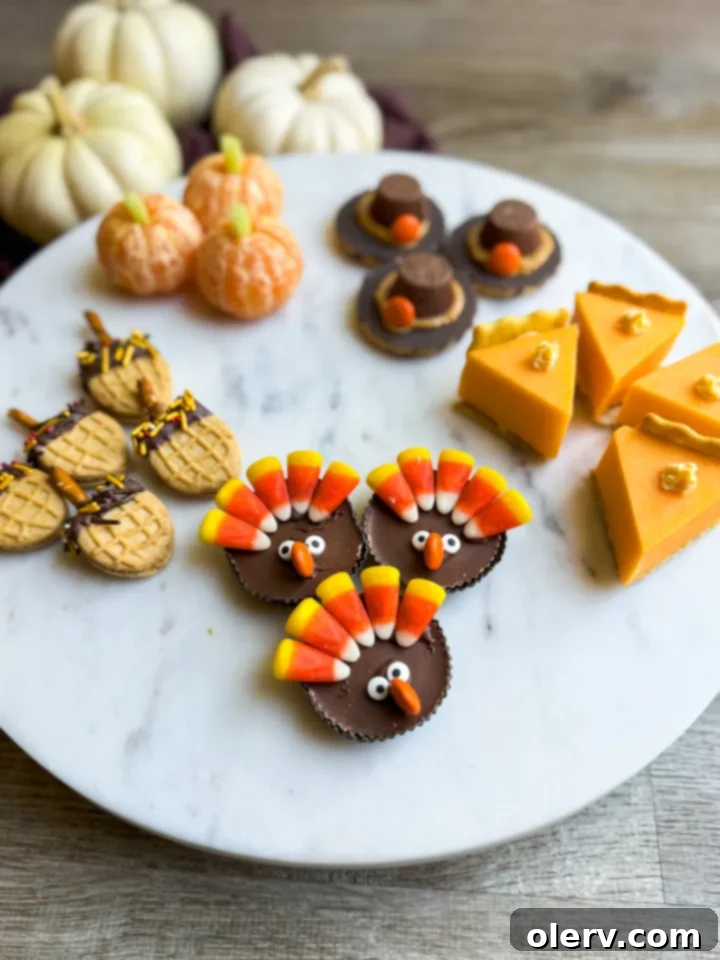
These perfectly portioned Tiny Thanksgiving Treats, like pumpkin cuties and chocolate turkeys, allow you to indulge in a bit of everything during the holidays. This specific recipe focuses on crafting the adorable Chocolate Turkeys.
5 minutes
5 minutes
Ingredients for Chocolate Turkeys
- Reese’s Peanut Butter Cups
- Candy Corn
- Edible Eyes
- Reese’s Pieces (small, for beak/wattle)
- Melting Chocolate (chocolate chips or candy melts)
Instructions for Chocolate Turkeys
- Melt the chocolate down in a microwave-safe bowl or double boiler until smooth and fluid.
- Place a thin strip of melted chocolate along the top rim of a Reese’s Peanut Butter Cup. Carefully stick 3-5 pieces of candy corn onto the chocolate strip, arranging them to fan out as turkey feathers.
- Add a small dab of melted chocolate to the front-center of the Reese’s cup. Press two edible eyes onto this chocolate. Attach a small Reese’s Piece (like an orange or red one) below the eyes with another tiny dab of melted chocolate to form the beak/wattle. Allow the chocolate turkeys to cool and set completely before serving.
