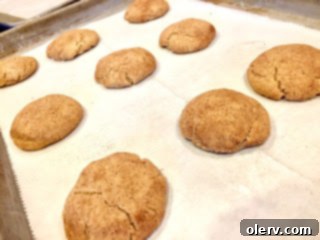
Irresistibly Gooey Brown Butter Caramel Stuffed Snickerdoodles: Your New Favorite Cookie Recipe
Happy New Year, fellow bakers! As we step into a new year, it’s the perfect time to infuse our kitchens with exciting new flavors and create cherished baking memories. And I’ve got just the recipe to kick off the year with a bang: a cookie so extraordinary, it’s destined to become a top-ten favorite in your recipe repertoire. Prepare to be amazed by these Brown Butter Caramel Stuffed Snickerdoodles – a delightful twist on a beloved classic that elevates comfort food to an art form.
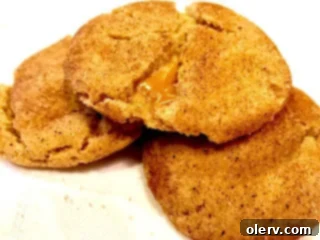
The Magic Behind the Name: Brown Butter Caramel Stuffed Snickerdoodles
The name itself is a wonderful mouthful, isn’t it? But every word is crucial to describing the sheer wonder of these cookies. Have you ever encountered a treat so incredibly appealing, so wonderfully innovative, that you simply *must* try it? That’s precisely the feeling these cookies evoke. We’re taking a beloved classic snickerdoodle recipe and transforming it into something truly gourmet, all thanks to a few ingenious additions.
The first secret lies in browned butter. This isn’t just melted butter; it’s butter taken to a higher plane of existence. By carefully heating unsalted butter until its milk solids toast and turn a beautiful golden-brown, we unlock a depth of flavor that is profoundly nutty, rich, and subtly caramel-like. This Maillard reaction creates complex compounds that add an unparalleled complexity to the cookie base, perfectly complementing the traditional snickerdoodle spice blend. It’s a fundamental flavor builder that sets these cookies apart.
Next, we introduce the **gooey caramel surprise** nestled right in the center. Imagine biting into a soft, chewy cookie, only to discover a molten pocket of sweet, buttery caramel melting in your mouth. This unexpected burst of warmth and sweetness takes the entire experience over the top, creating an irresistible contrast with the cookie’s tender exterior and spicy coating. It’s a delightful secret that makes each bite an adventure.
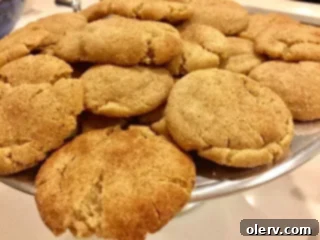
Of course, no snickerdoodle would be complete without its signature **cinnamon-sugar coating**. We generously roll each cookie dough ball in this fragrant blend, ensuring every surface carries that familiar, comforting spice and a hint of sparkle. And for a final touch that truly balances the sweetness and enhances all the flavors, a delicate sprinkle of **sea salt** on top. This subtle addition amplifies the caramel and brown butter notes, providing a sophisticated finish. So, with nutty brown butter, luscious caramel, comforting cinnamon, sweet sugar, and a hint of salt, we’re crafting a symphony of flavors, textures, and elements that come together in the most perfect, sweet harmony imaginable.
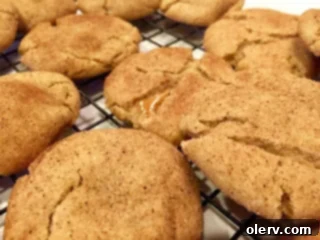
The Science of Baking: Why Chilling Cookie Dough is Essential
Many home bakers, myself included, often wonder if chilling cookie dough is truly a necessary step. Is it worth the extra hour (or more!) of waiting? Will skipping it really make a difference to the final cookie? These are questions that swirl through my mind almost every time a recipe calls for refrigeration. So, I took it upon myself to dive into the science, and what I discovered is fascinating – and crucial for perfect cookies!
The primary reason for chilling cookie dough is to **solidify the fat** (butter, in this case). When the fat is cold and firm, it takes longer to melt in the oven. This slower melting process means your cookies spread less, resulting in thicker, chewier cookies with a more desirable texture and a slightly crispy edge. If you bake dough at room temperature, the butter melts quickly, causing the cookies to spread out too much and become thin and overly crispy.
But the benefits don’t stop there. Chilling also allows the **flour to fully hydrate**. This means the flour absorbs more moisture from the wet ingredients, leading to a more tender and uniform texture in the baked cookie. It helps prevent a “gritty” texture and creates a smoother, more cohesive dough. This hydration process also contributes to that coveted chewy texture that makes a snickerdoodle truly great.
Furthermore, and perhaps most importantly for flavor, chilling dough gives the ingredients time to **meld and deepen in flavor**. As the dough rests, the sugars and other components have a chance to fully integrate, resulting in a richer, more complex taste profile. This is especially true for recipes with ingredients like brown butter or spices, where the flavors benefit immensely from a longer “steeping” period. The brown butter’s nutty notes become more pronounced, and the cinnamon’s warmth permeates every particle of dough, creating a more harmonious and intense flavor experience.
As insightful research from sources like King Arthur Baking Company points out, “Chilling cookie dough before baking solidifies the fat in the cookies. As the cookies bake, the fat in the chilled cookie dough takes longer to melt than room-temperature fat. And the longer the fat remains solid, the less cookies spread.” For those who love to delve deeper into the exact science and see comparative results, I highly recommend reading PJ Hamel’s excellent article on the topic. While I won’t go into every scientific detail here, rest assured: **the chilling time is incredibly important for the success of this recipe!** Trust me, the wait is absolutely worth it for these extraordinary snickerdoodles – it’s the secret to their perfect texture and depth of flavor.
Expert Tips for Perfect Brown Butter Caramel Stuffed Snickerdoodles
To ensure your Brown Butter Caramel Stuffed Snickerdoodles turn out perfectly every time, here are some essential tips from my kitchen to yours:
- Seal the Caramel Completely: This is arguably the most critical step for success! When wrapping the dough around the caramel piece, make sure there are absolutely no gaps or visible caramel. The dough needs to entirely encase the caramel. If even a tiny bit of caramel is exposed, it will melt out during baking, harden on the baking sheet, and you’ll lose that delightful molten center. Take your time to create a smooth, sealed ball.
- Be Generous with Cinnamon Sugar: Do not be shy with the cinnamon-sugar coating! A generous layer ensures a vibrant flavor, a slightly textured exterior, and that quintessential snickerdoodle aesthetic. During baking, some of this coating will melt and infuse into the dough, so a good initial amount helps retain that classic, comforting spice throughout the cookie.
- Master the Brown Butter Technique: Browning butter is a quick and incredibly rewarding process, but it demands your full attention. Heat your sliced unsalted butter over medium heat in a light-colored, thick-bottomed skillet so you can clearly see the color changes. Whisk constantly. The butter will melt, then foam vigorously. Soon after, small golden-brown flecks will appear at the bottom of the pan, and you’ll notice a distinct, nutty aroma. As soon as you see these signs and smell the fragrance, remove it immediately from the heat and pour it (including the browned bits) into a separate, cool bowl to stop the cooking process. It can go from perfect to burnt in seconds!
- Cool the Browned Butter Thoroughly: This is a crucial follow-up step to browning butter. Allow your browned butter to cool completely to room temperature before incorporating it into your wet ingredients. Adding hot or even warm butter can melt the sugars prematurely, cook the eggs, and throw off the consistency of your dough, leading to a greasy or overly spread-out cookie. Patience here pays off immensely in the final texture of your snickerdoodles.
- Choose the Right Caramel: For best results, use individually wrapped, firm caramel squares (like the classic Kraft Caramels often used for caramel apples). These hold their shape well enough to be enclosed in the dough and melt beautifully into a soft, chewy surprise. Avoid overly soft, liquid, or homemade caramels that might be too difficult to work with and more prone to oozing out during baking. Simplicity is key for maximum gooey goodness.
- Accurate Flour Measurement: For consistent results in baking, especially with cookies, always measure your flour by spooning it into a dry measuring cup and then leveling it off with a straight edge (like the back of a knife), rather than scooping directly from the bag. This prevents over-packing the flour, which can lead to a denser, drier, and tougher cookie.
- Don’t Overmix the Dough: Once you’ve added the dry ingredients to the wet mixture, mix only until they are just combined. Overmixing develops the gluten in the flour, which can result in tough, less tender cookies. A few streaks of flour are perfectly fine; they will disappear during the brief chilling period and subsequent handling.
Ingredients for Brown Butter Caramel Stuffed Snickerdoodles
Gather your high-quality ingredients to create these unforgettable, gourmet treats. Precision in measurement is key to success!
Cookie Dough:
- 2 1/2 cups all-purpose flour
- 1 teaspoon baking soda
- 2 teaspoons cream of tartar (essential for that classic snickerdoodle tang and chewiness)
- 1/2 teaspoon ground cinnamon
- 1/2 teaspoon sea salt (finely ground works best for even distribution)
- 1 cup unsalted butter, sliced (for browning, contributes to the rich flavor)
- 1 1/4 cup dark brown sugar, packed (adds moisture and deep molasses flavor)
- 1/2 cup granulated sugar
- 1 large egg
- 1 egg yolk (for extra richness and chewiness)
- 1 tablespoon vanilla extract (pure vanilla extract provides the best flavor)
- 1 tablespoon plain Greek yogurt (adds tenderness, moisture, and a subtle tang to balance sweetness)
- About 1 cup caramel squares, individually wrapped, cut into 1/4’s (approximately 20-25 pieces, depending on size)
For Rolling the Cookies:
- 1/4 cup granulated sugar
- 2 teaspoons ground cinnamon
For Finishing:
- Sea salt, for sprinkling on top of baked cookies (a flaky sea salt like Maldon adds great texture and visual appeal)
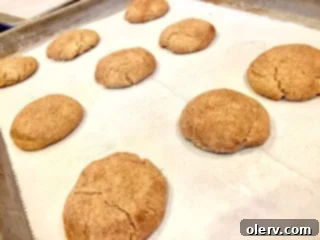
DIRECTIONS: Step-by-Step to Snickerdoodle Perfection
- Prepare Dry Ingredients: In a medium-sized bowl, whisk together the all-purpose flour, baking soda, cream of tartar, ground cinnamon, and the 1/2 teaspoon of sea salt until all ingredients are thoroughly combined. Ensure there are no clumps. Set this mixture aside.
- Brown the Butter: Place a light-colored, thick-bottomed skillet over medium heat. Add the sliced unsalted butter. As the butter melts, begin whisking frequently to ensure even cooking and prevent burning. The butter will first melt, then foam vigorously. Continue whisking, watching closely for small golden-brown specks to appear at the bottom of the pan and a distinct, nutty aroma to emerge. This process typically takes 5-8 minutes. As soon as you observe these signs, immediately remove the pan from the heat and pour the browned butter (including the browned bits, which are packed with flavor) into a separate, heat-proof bowl. Allow it to cool completely to room temperature, which may take 20-30 minutes. This is crucial for the dough’s final consistency.
- Combine Wet Ingredients: Once the browned butter is fully cooled, transfer it to the bowl of a stand mixer fitted with the paddle attachment. Add the packed dark brown sugar and granulated sugar. Mix on medium speed until the sugars and butter are well blended and smooth, scraping down the sides of the bowl as needed to ensure everything is incorporated. Next, beat in the large egg, egg yolk, vanilla extract, and plain Greek yogurt until everything is fully combined and the mixture appears light and fluffy.
- Form the Dough and Chill: Gradually add the whisked dry ingredients to the wet mixture, mixing on low speed until *just* combined. Be careful not to overmix; overmixing can develop gluten, resulting in tough cookies. Once the dough comes together and is mostly uniform, form it into a ball, cover it tightly with plastic wrap, and place it in the refrigerator. Chill the dough for a minimum of 30 minutes, or for optimal flavor development and texture, chill it overnight (up to 24 hours). The longer chill time truly enhances the cookie.
- Preheat Oven & Stuff Caramels: When you’re ready to bake, preheat your oven to 350°F (175°C). Prepare a large baking sheet by lining it with a silicone baking mat or parchment paper; this helps prevent sticking and promotes even baking. Take approximately two tablespoons of the chilled dough (using a cookie scoop can ensure consistent sizing) and roll it into a smooth ball. Gently flatten this ball in the palm of your hand and place one quarter-sized piece of caramel in the center. Carefully wrap the cookie dough around the caramel, ensuring it is completely sealed and no caramel is visible. Any exposed caramel will melt out.
- Coat and Arrange: In a small, shallow bowl, combine the 1/4 cup granulated sugar and 2 teaspoons ground cinnamon for the coating. Roll each caramel-stuffed dough ball generously in this cinnamon-sugar mixture, ensuring it’s fully coated on all sides. Place the coated dough balls on your prepared baking sheet, spacing them about two inches apart to allow for proper spreading during baking. For that extra touch of gourmet goodness and flavor balance, lightly sprinkle the tops of the cookie dough balls with a pinch of flaky sea salt.
- Bake and Cool: Bake the cookies for 8-10 minutes. The cookies are done when the edges are lightly golden brown and the centers still appear soft and slightly underdone. Remember, cookies continue to cook slightly on the hot baking sheet even after being removed from the oven, which contributes to their chewiness. Allow the cookies to cool on the baking sheet for 2-3 minutes to set before carefully transferring them to a wire cooling rack to cool completely. Enjoy these warm with a glass of milk or once they’ve fully cooled! The caramel will be wonderfully gooey when warm and deliciously chewy once cooled.
Storage and Serving Suggestions
These delectable Brown Butter Caramel Stuffed Snickerdoodles are a true indulgence, and while they are fantastic fresh, here’s how to store and serve them to maximize their deliciousness:
- Storage: Store leftover baked cookies in an airtight container at room temperature for up to 3-4 days. To maintain their chewiness and prevent them from drying out, you might even place a slice of bread in the container to help retain moisture.
- Reheating for Gooeyness: For optimal gooey caramel, you can briefly warm individual cookies in the microwave for 10-15 seconds before serving. Alternatively, a few minutes in a preheated oven at 275°F (135°C) will also revive them beautifully.
- Freezing Baked Cookies: For longer storage, completely cooled baked cookies can be frozen for up to 1-2 months. Place them in a single layer on a baking sheet to freeze solid, then transfer them to a freezer-safe bag or container, separating layers with parchment paper. Thaw at room temperature for a couple of hours or reheat gently as mentioned above.
- Freezing Cookie Dough: You can also freeze the unbaked, caramel-stuffed and cinnamon-sugar coated cookie dough balls. After rolling and coating them, place them on a baking sheet and freeze until solid. Once frozen, transfer them to a freezer-safe bag. When ready to bake, you might need to add an extra 1-3 minutes to the baking time without thawing.
- Serving Ideas: These cookies are fantastic on their own, but they also pair wonderfully with a scoop of premium vanilla bean ice cream (especially when warm!), a dollop of fresh whipped cream, or a warm mug of coffee, hot chocolate, or spiced tea. They make a fantastic addition to any dessert platter, a comforting after-school treat, or a thoughtful homemade gift for friends and family.
Conclusion
These Brown Butter Caramel Stuffed Snickerdoodles are more than just a cookie; they’re an experience. The rich, nutty notes of brown butter, the comforting warmth of cinnamon, the sweet burst of molten caramel, and the subtle crunch of sea salt all combine to create a truly unforgettable treat. They’re perfect for celebrations, cozy nights in, or simply when you need a little indulgence. Don’t let the extra steps deter you – every moment spent on these cookies is an investment in pure delight. Go ahead, bake a batch, and let these extraordinary snickerdoodles become a cherished part of your recipe collection and a new family favorite!
