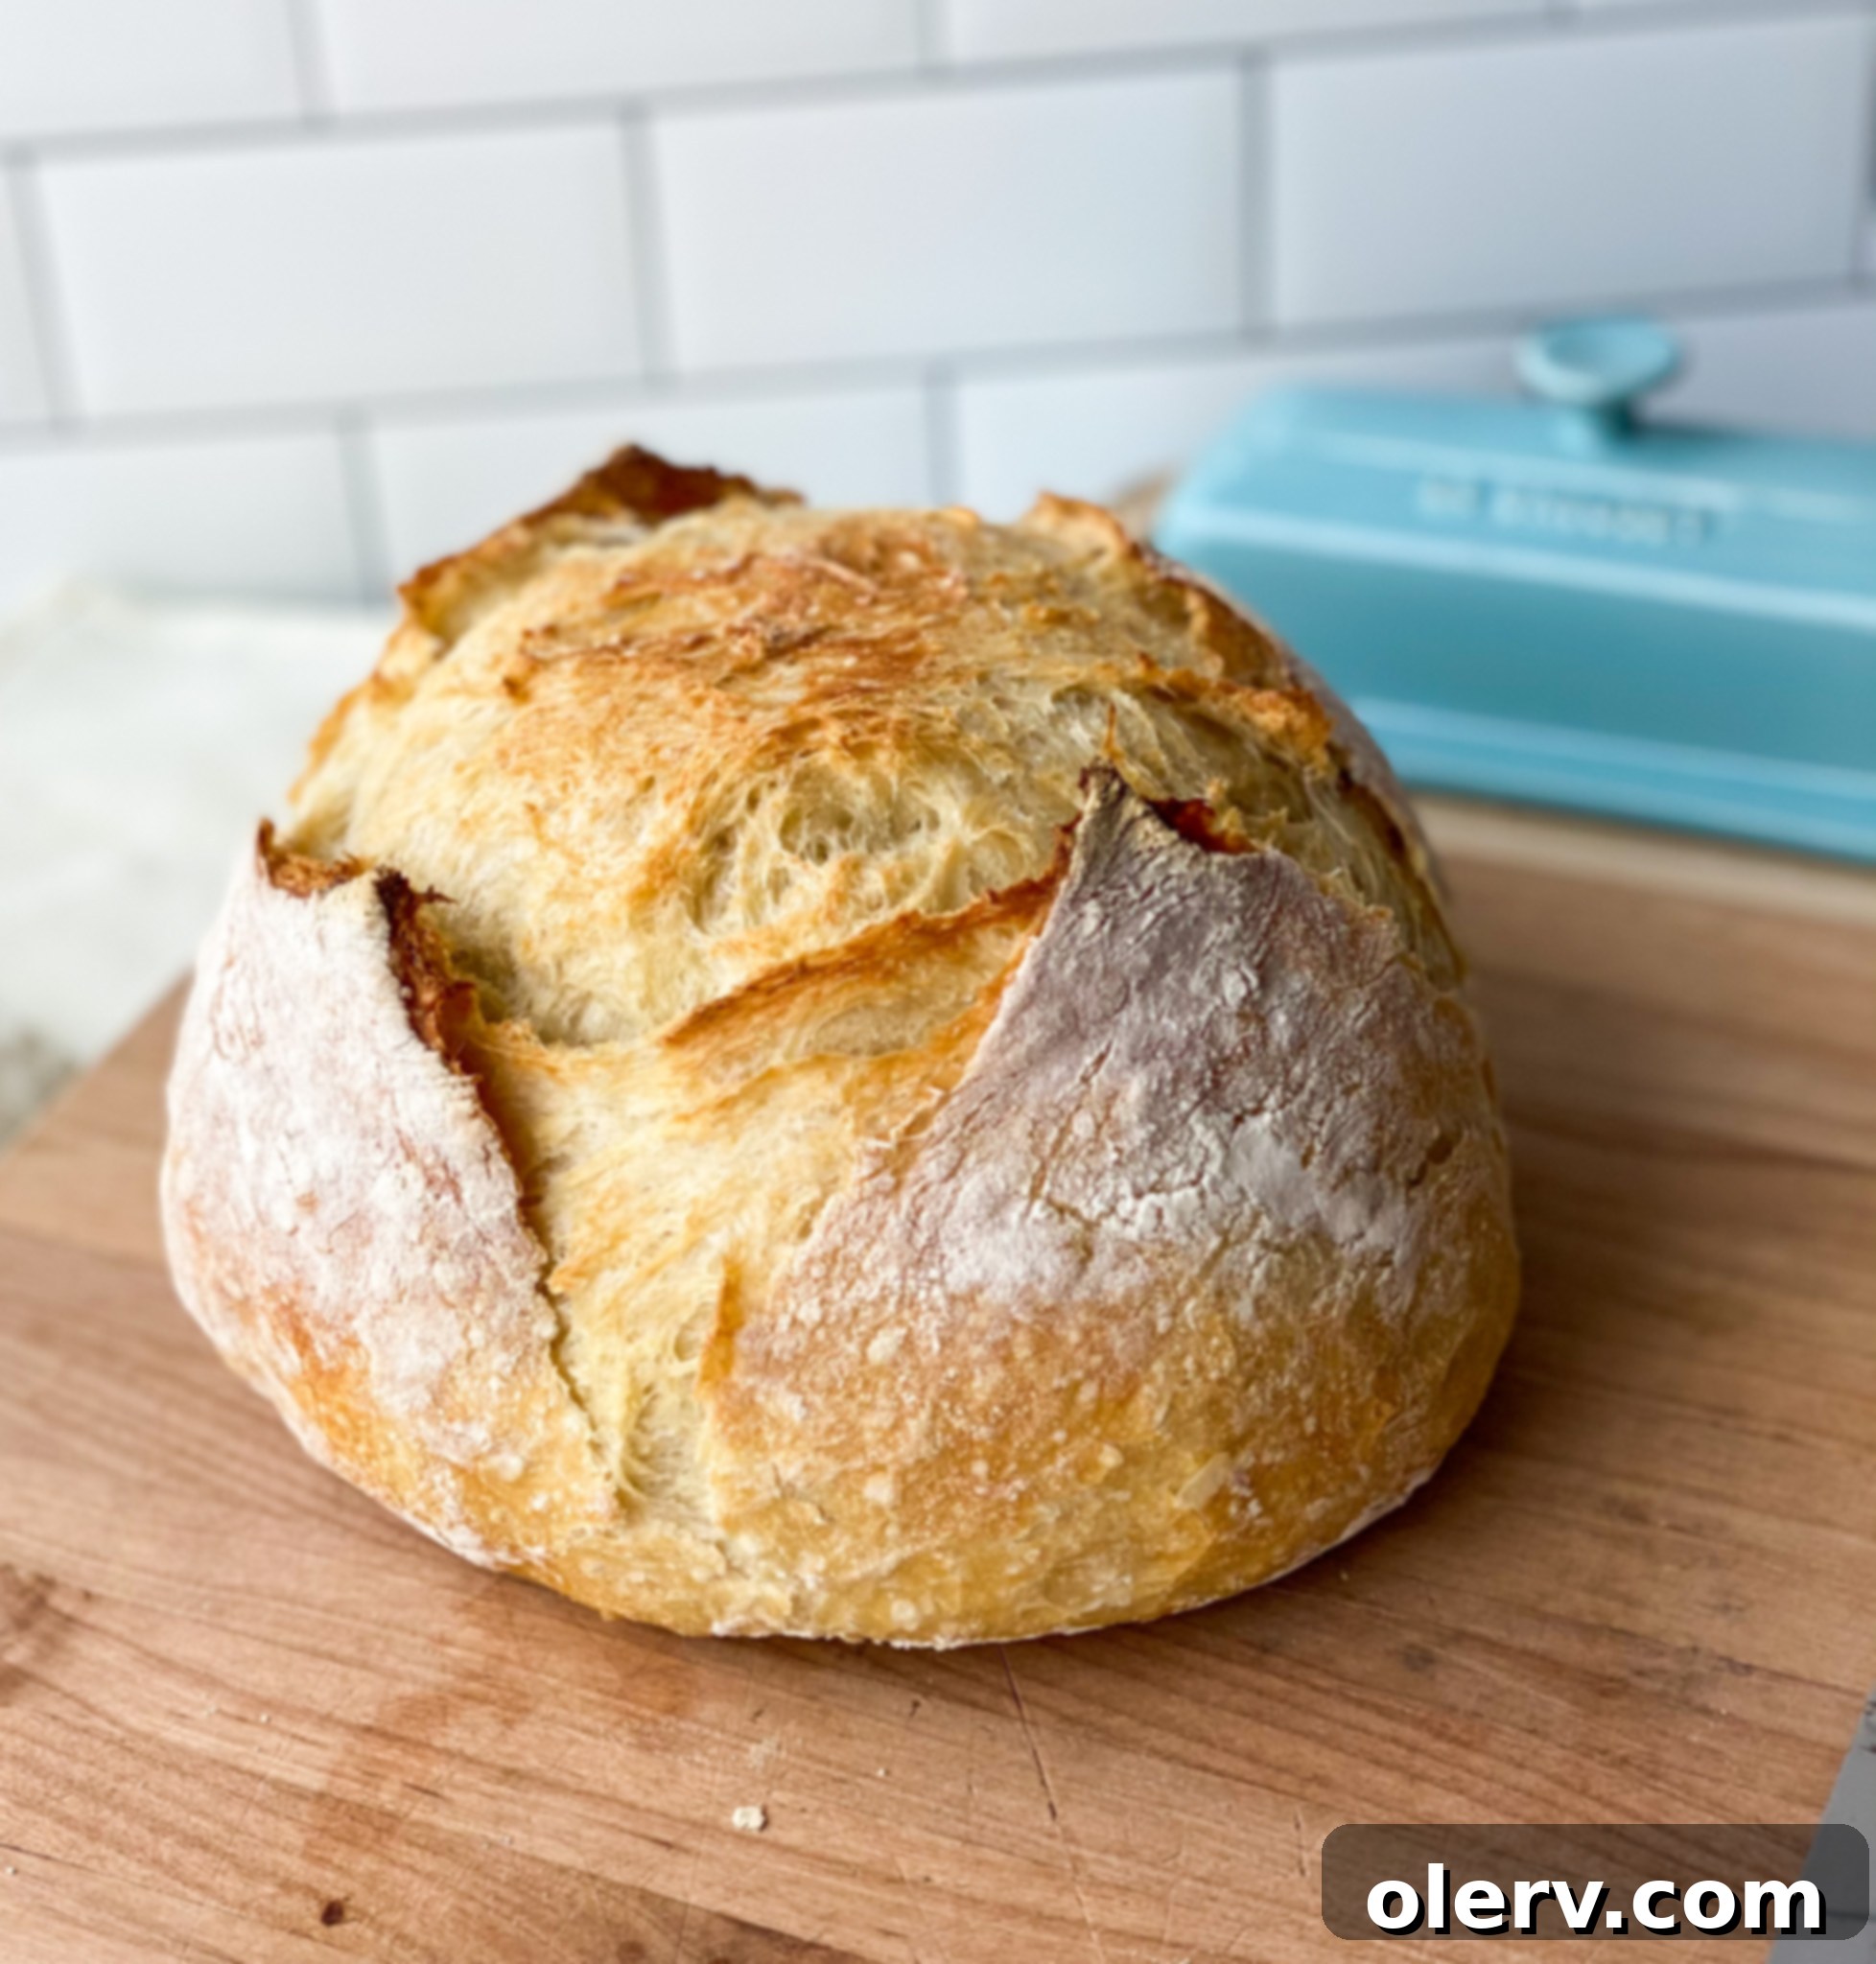
Easy Homemade Bread: The Ultimate No-Knead 4-Ingredient Recipe for Beginners
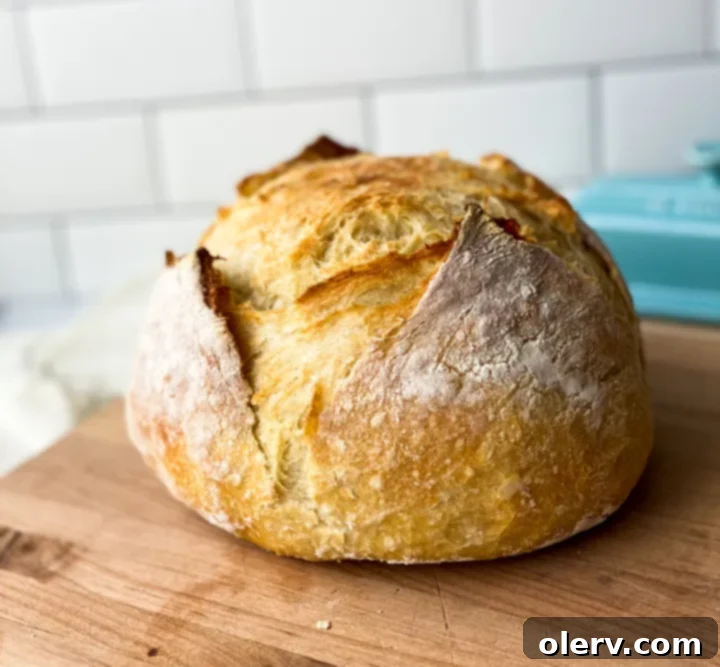
Imagine the irresistible aroma of freshly baked bread wafting through your kitchen, a golden-brown crust crackling as you slice into a soft, airy interior. What if we told you that achieving this culinary dream doesn’t demand hours of strenuous kneading, complicated techniques, or a long list of exotic ingredients? This is the ultimate **easy homemade bread** recipe, perfect for beginners and seasoned bakers alike. It’s a **no-knead, 4-ingredient wonder** that delivers authentic, artisan-quality loaves with minimal hands-on effort. Forget the intimidating world of professional baking – if you have water, flour, yeast, salt, and a bit of patience, you can absolutely bake the best bread right in your own home!
This beginner-friendly approach to bread making relies on the magic of time, allowing simple ingredients to transform into something truly extraordinary. With just a few minutes of mixing, followed by an overnight rest, you’ll be well on your way to enjoying delicious, **fresh baked bread** that rivals any bakery. Get ready to impress your family and friends, or simply treat yourself to the profound satisfaction of creating a staple food from scratch. If I can master this **simple bread recipe**, you most certainly can too!
Embarking on Your Homemade Bread Journey: A Beginner’s Guide
The thought of baking fresh bread can often feel daunting. Perhaps you’ve been deterred by visions of flour-dusted counters, intricate techniques, or the fear of a dense, unappetizing outcome. I certainly shared those sentiments! My personal journey into **homemade bread making** began in the early months of 2020, a time when many of us found ourselves with extra hours and a desire to learn new skills. It was then that I decided to confront my apprehension about working with yeast and delve into the rewarding world of baking.
For years, I believed that a “baking talent” was an innate gift, something I simply didn’t possess. However, through persistent practice and a willingness to learn, I discovered that anyone can achieve success in the kitchen, especially with the right guidance. The key isn’t a mysterious talent, but rather a combination of fresh ingredients, a reliable recipe, and a healthy dose of patience. This **beginner easy homemade bread recipe** is designed to provide exactly that — a clear, achievable path to baking success. It simplifies the process, proving that a beautiful, delicious loaf is well within your reach.
This recipe stands as a testament to simplicity. With just four common ingredients and a brilliant no-knead method, it shatters the misconception that bread baking must be complex. You won’t need a stand mixer, fancy attachments, or hours of elbow grease. Just embrace the simple steps, trust in the transformative power of time, and prepare to redefine your baking potential. Let’s make the joy of “fresh homemade bread” a regular and enjoyable reality in your kitchen!
Mastering Easy Overnight Bread: The Power of 4 Ingredients (No Kneading!)
The true genius of this **easy overnight bread** lies in its astonishingly simple foundation. You need only four fundamental ingredients and the wisdom to allow ample time for the dough to develop. There’s no laborious kneading, no complex folding patterns – just a gentle mix and patient waiting. It’s crucial to understand that attempting to rush the bread-making process is the surest path to disappointment. Here, patience isn’t just a virtue; it’s a vital ingredient for success!
The Essential 4: Flour, Yeast, Salt, and Water
Let’s take a closer look at the quartet of ingredients that form the backbone of this incredible **no-knead bread** recipe:
- All-Purpose Flour: This forms the main structure of your loaf. While various flours can be used, all-purpose flour is ideal for beginners due to its consistent performance and accessibility. It provides the necessary protein to develop gluten, which gives bread its chewiness and structure.
- Instant Yeast (or Active Dry Yeast): This is your primary leavening agent, the microscopic miracle worker that makes your dough rise, creating its signature airy texture and contributing significantly to the bread’s flavor. We’ll discuss yeast types further, but the absolute most critical factor is its freshness.
- Salt: Often underestimated, salt is far more than a seasoning. It is essential for enhancing the bread’s flavor profile, balancing the sweetness of the yeast, and strengthening the gluten structure. Furthermore, salt helps regulate the yeast’s activity, ensuring a controlled, flavorful rise. Never omit salt from your bread recipes!
- Warm Water: This is the medium that hydrates the flour and activates the yeast. The temperature of the water is critical: it needs to be warm enough to awaken the yeast (around 100-110°F or 38-43°C, similar to a warm bath) but not so hot that it kills the yeast, rendering it ineffective.
Understanding Your Yeast: The Heart of the Rise
For this **no-knead bread recipe**, both active dry yeast and rapid rise (also known as instant or quick rise) yeast will yield excellent results. While active dry yeast traditionally requires “proofing” in warm water to confirm its activity, and instant yeast can be mixed directly with dry ingredients, the long fermentation time in this recipe is forgiving enough for either. The sustained warm environment of the long rise ensures both types activate effectively.
The paramount concern, however, is the **freshness** of your yeast. Yeast is a living microorganism, and its potency diminishes over time. Using old or expired yeast will inevitably lead to a flat, dense, and bland loaf, as it simply won’t produce the carbon dioxide needed for a proper rise. To guarantee optimal freshness for every bake, I strongly recommend storing your yeast in an airtight container in the freezer. This simple trick dramatically extends its shelf life and ensures consistently successful, beautifully risen loaves.
The Magic of Time: Letting Your No-Knead Dough Rest and Rise
I cannot stress this enough: time is your most crucial partner in crafting this **easy homemade bread**. This isn’t meant to intimidate you, but rather to highlight the importance of planning ahead. The true magic of this **no-knead bread** unfolds during its extended resting period, transforming simple ingredients into a dough rich in flavor and texture. This long, slow fermentation is precisely what allows you to achieve a loaf with artisan-quality characteristics, all with minimal hands-on effort.
The Overnight Fermentation Process for Flavor and Texture
Once you’ve effortlessly combined your four ingredients into a sticky dough ball, it’s time for the dough to rest and rise. Transfer the dough to a large bowl, cover it snugly with plastic wrap (or a damp kitchen towel to prevent drying), and place it in a room-temperature area of your kitchen. The ideal rising time for this **overnight bread** is typically **12-18 hours**, or until the dough’s surface is covered in numerous small bubbles and it has at least doubled in size. Many find it convenient to prepare the dough before bed and wake up to a perfectly proofed dough, ready for the next stage.
During this prolonged resting period, the yeast embarks on a remarkable journey. It actively feeds on the natural starches in the flour, breaking them down through a process called fermentation. This metabolic activity produces carbon dioxide gas, which creates the beautiful air pockets and light, open texture of your bread. Beyond aeration, this slow fermentation also develops deep, complex flavors. You’ll notice that this dough, despite not being a traditional sourdough, acquires a remarkably similar taste and texture to a true sourdough loaf. This subtle tang and rustic quality are a direct result of the extended, patient rise, making this **simple bread recipe** truly exceptional.
Why Long Fermentation Matters for Achieving Artisan Quality
Beyond the undeniable convenience of the no-knead method, extended fermentation offers several profound benefits that elevate your bread to an artisan level:
- Enhanced Flavor Complexity: The yeast has ample time to consume various sugars and produce a wider array of flavorful byproducts. This results in a more nuanced, deeper taste, often featuring a delightful hint of tanginess reminiscent of traditional **sourdough bread**.
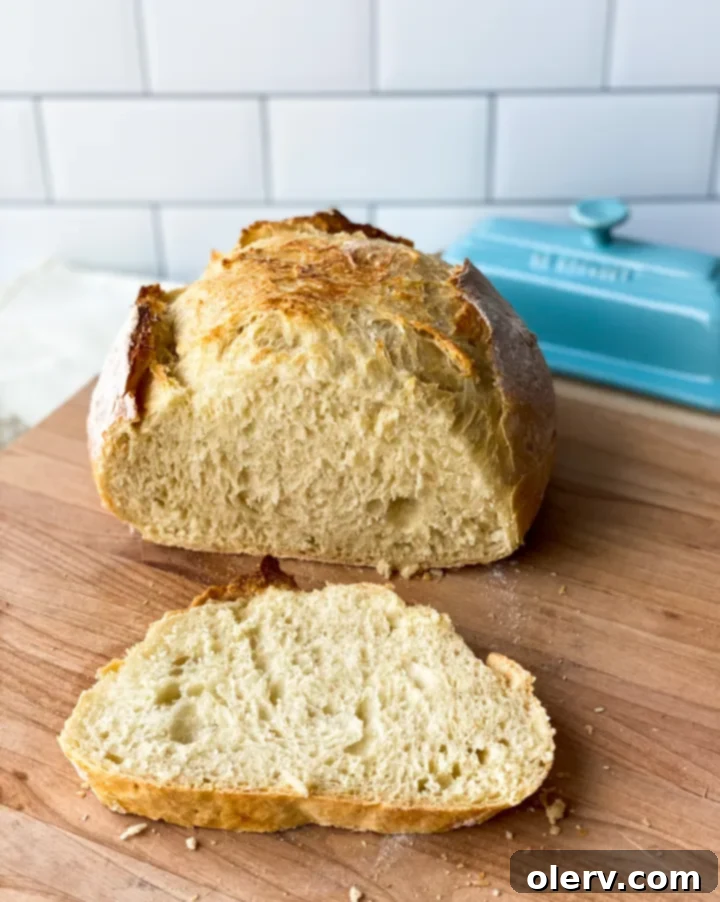
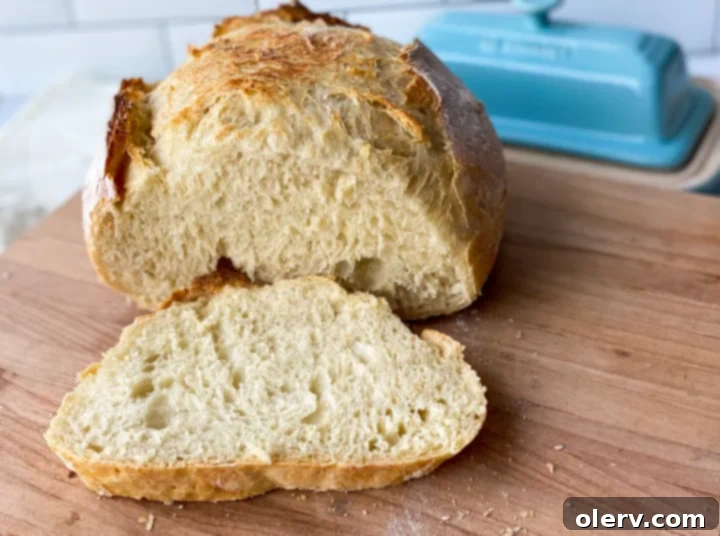
- Superior Texture Development: The slow rise allows the gluten network within the dough to develop naturally without mechanical kneading. This leads to an incredibly open, airy crumb with desirable large, irregular holes – a signature characteristic of truly **artisan bread**.
- Improved Digestibility: Longer fermentation periods can help break down some of the complex carbohydrates and proteins in flour, potentially making the bread easier to digest for some individuals.
- Unmatched Simplicity: Ultimately, this method is the easiest way to achieve incredible results. The sequence is beautifully simple: mix, wait patiently, and then bake. This is the inherent beauty and effectiveness of this **easy homemade bread**!
Achieving the Perfect Crust: Homemade Bread Baking with a Dutch Oven
For truly exceptional results with this **easy homemade bread recipe**, a **Dutch oven** is an indispensable tool. This heavy, lidded pot acts as a mini-oven within your main oven, masterfully trapping steam around the bread during the initial baking phase. This trapped steam is absolutely vital for developing that wonderfully crisp, deeply golden crust, and it ensures the bread expands beautifully, achieving maximum “oven spring” before the crust sets too quickly.
Why a Dutch Oven Makes All the Difference for Artisan-Style Bread
Baking **no-knead bread in a Dutch oven** meticulously replicates the professional, steam-injected ovens found in dedicated artisan bakeries. Here’s why this method yields such superior results:
- Optimal Steam Retention: The tightly sealed environment of the Dutch oven effectively traps the natural moisture released by the dough as it heats. This steam keeps the surface of the bread moist, allowing the dough to expand fully and preventing the crust from hardening prematurely, which would otherwise restrict its rise.
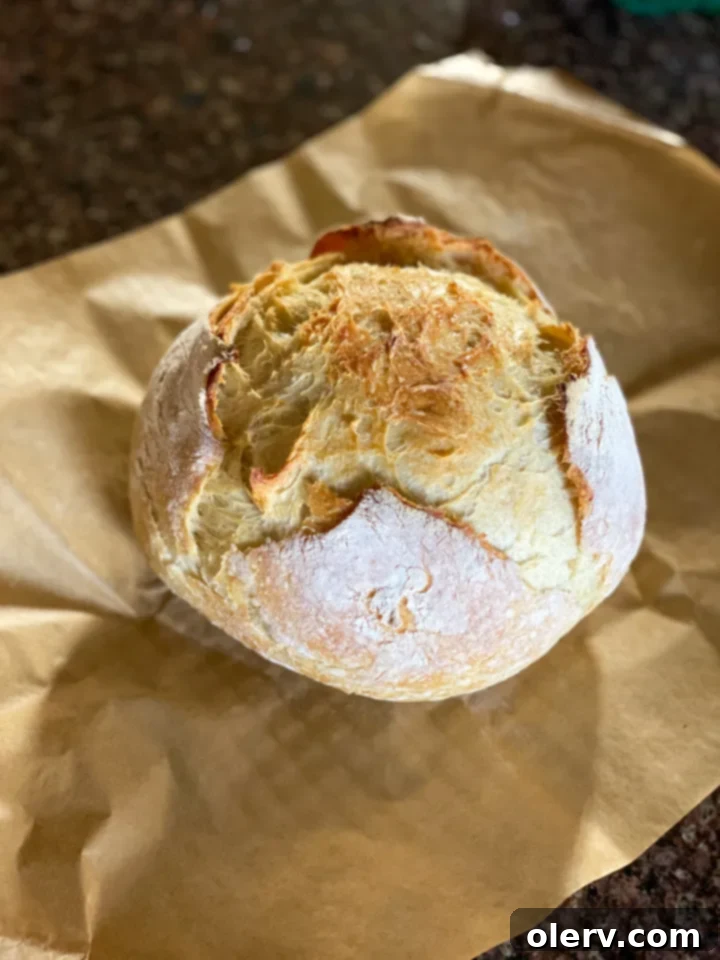
- Incredibly Crispy Crust: Once the lid is removed during the final baking stage, the trapped moisture rapidly evaporates. This, combined with the intense, direct heat from the preheated pot, creates an exceptionally thin, shatteringly crisp, and perfectly caramelized crust that is the hallmark of **homemade artisan bread**.
- Even Heat Distribution: Dutch ovens, typically made of cast iron or heavy ceramic, are excellent at distributing heat uniformly. This ensures your loaf bakes consistently from all sides, eliminating concerns about a burnt bottom or an undercooked top.
The Importance of Preheating Your Dutch Oven
To fully harness the benefits of baking with a Dutch oven, proper preheating is essential. Place your Dutch oven (including its lid) inside your cold oven, then preheat the oven to 450°F (232°C). Allow the Dutch oven to heat up for at least 30 minutes once the oven reaches temperature. This ensures the pot is intensely hot when the dough is placed inside, providing that critical initial burst of heat that contributes significantly to remarkable oven spring and a truly superior crust.
No Dutch Oven? No Problem! Alternative Baking Methods
While a Dutch oven is highly recommended for achieving the best possible crust and texture, its absence should never deter you from making this incredible **homemade bread**! You have several viable alternatives:
- Crock-Pot Insert: Many ceramic or stoneware inserts from slow cookers are oven-safe (always double-check your manufacturer’s guidelines). These can serve as a suitable substitute.
- Deep Stoneware Baking Dish: A deep ceramic or stoneware casserole dish with high sides can also work effectively.
- Creating a Makeshift Lid: If your chosen alternative pot or dish lacks an oven-safe lid, you can fashion one by tightly covering it with heavy-duty aluminum foil. This will still help to trap some essential steam during the initial bake.
- Baking Stone or Heavy Baking Sheet with Steam: For a less ideal but still functional approach, bake the bread on a preheated baking stone or a heavy-duty baking sheet. To generate some steam, place a metal pan filled with hot water on the bottom rack of your oven during the first part of the bake.
The goal is to replicate that steamy, enclosed environment as closely as possible. Don’t worry about achieving absolute perfection on your very first attempt; the most important thing is to enjoy the journey and savor the delicious outcome of your efforts!
Essential Tips for No-Knead Bread Success
To ensure your journey into crafting **easy homemade bread** is nothing short of triumphant, keep these critical tips in mind. They’ll help you navigate the process confidently and achieve consistently delicious results:
- Read the Entire Recipe First: This may seem basic, but familiarizing yourself with all the steps, especially the timing for the long rise, is crucial for smooth execution and successful planning.
- Measure Accurately: Especially with flour, precise measurements significantly impact the final texture. For best results, use a kitchen scale. If using measuring cups, employ the ‘spoon and level’ method (spoon flour into the cup, then level off with a straight edge) to avoid compacting the flour.
- Yeast Freshness is Paramount: As reiterated, fresh yeast is non-negotiable. If you’re uncertain about your active dry yeast’s potency, “proof” a small amount in a few tablespoons of warm water with a pinch of sugar. If it becomes foamy within 5-10 minutes, it’s active!
- Embrace the Sticky Dough: Don’t be alarmed if the dough feels quite wet and sticky after initial mixing. This high hydration is intentional; it’s what contributes to the incredibly open, airy crumb. Resist the urge to add excessive extra flour at this stage, as it can lead to a dense loaf.
- Handle Gently After Rising: Once the dough has completed its long, glorious rise, handle it as gently as possible during the brief shaping process. Your goal is to preserve all those wonderful gas bubbles created by the yeast, which are vital for the bread’s light structure.
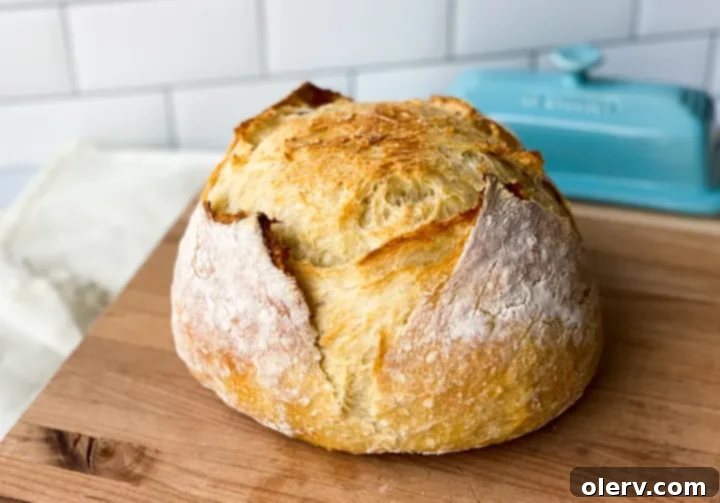
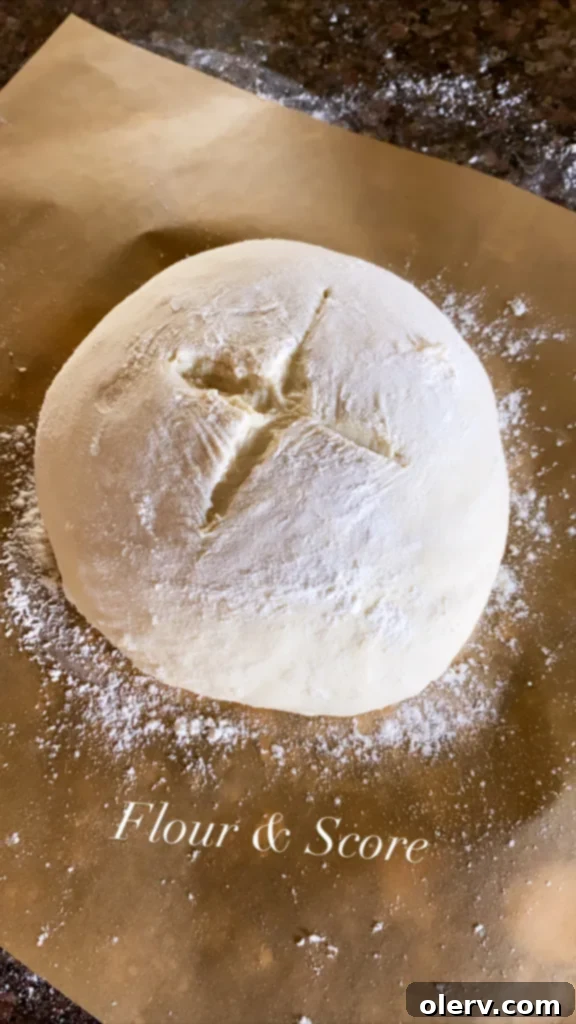
- Don’t Skip Scoring the Dough: The X-shape score you make on top of the dough before baking serves more than just an aesthetic purpose. It provides a controlled weak point, allowing the bread to expand predictably and beautifully in the oven (“oven spring”), preventing it from bursting open haphazardly. Use a very sharp knife, a razor blade (lame), or even sharp scissors.
- Patience with Cooling: It’s incredibly tempting to cut into that warm, fragrant loaf immediately after it comes out of the oven. However, resist this urge! Allowing the bread to cool for at least 30 minutes (and preferably longer, up to an hour) lets the internal structure set properly, preventing a gummy texture and ensuring clean, well-formed slices.
- Don’t Be Afraid to Ask: If you encounter any questions or challenges along the way, please don’t hesitate to seek clarification or advice. The primary goal is for you to succeed and delight in the experience of baking your own delicious **fresh baked bread**.
Serving Suggestions for Your Homemade Artisan Loaf
Once your magnificent **homemade artisan bread** has cooled to perfection, a world of culinary possibilities opens up! Here are just a few ideas to fully enjoy your creation:
- Simple & Classic Indulgence: A generous smear of good quality butter, perhaps sprinkled with a touch of flaky sea salt, is all you need to truly appreciate the bread’s flavor.
- Delightful Dipping: Serve thick slices alongside a bowl of high-quality olive oil for dipping, possibly infused with a crushed garlic clove and fresh herbs like rosemary or oregano.
- The Perfect Companion for Soups and Stews: This crusty bread is ideal for soaking up the rich, flavorful broths of hearty stews, creamy soups, or chili.
- Elevate Your Sandwiches & Toast: Transform your everyday sandwiches or morning toast with the unparalleled flavor and texture of truly homemade bread.
- Easy Bruschetta Base: Slice the bread, lightly toast it, and then top with fresh, diced tomatoes, fragrant basil, a drizzle of balsamic glaze, and creamy mozzarella for an exquisite appetizer.
- Homemade Croutons: If, by some miracle, you have any leftover bread (unlikely!), cube it, toss with olive oil and seasonings, and toast until golden for gourmet homemade croutons for your salads.
Baking this **simple bread recipe** is far more than just preparing food; it’s a deeply rewarding experience. From the humble mixing of four basic ingredients to the glorious aroma that fills your home during baking, and finally, to the first satisfying bite of your crusty masterpiece, you’ll feel a profound sense of accomplishment. This truly is the **best bread** you can easily make at home, requiring minimal hands-on effort but delivering maximum flavor, texture, and pure culinary joy. Embrace the straightforward process, trust the power of good ingredients, and very soon, you’ll be regularly enjoying warm, crusty, and utterly delicious **4-ingredient bread** straight from your own oven. Happy baking!
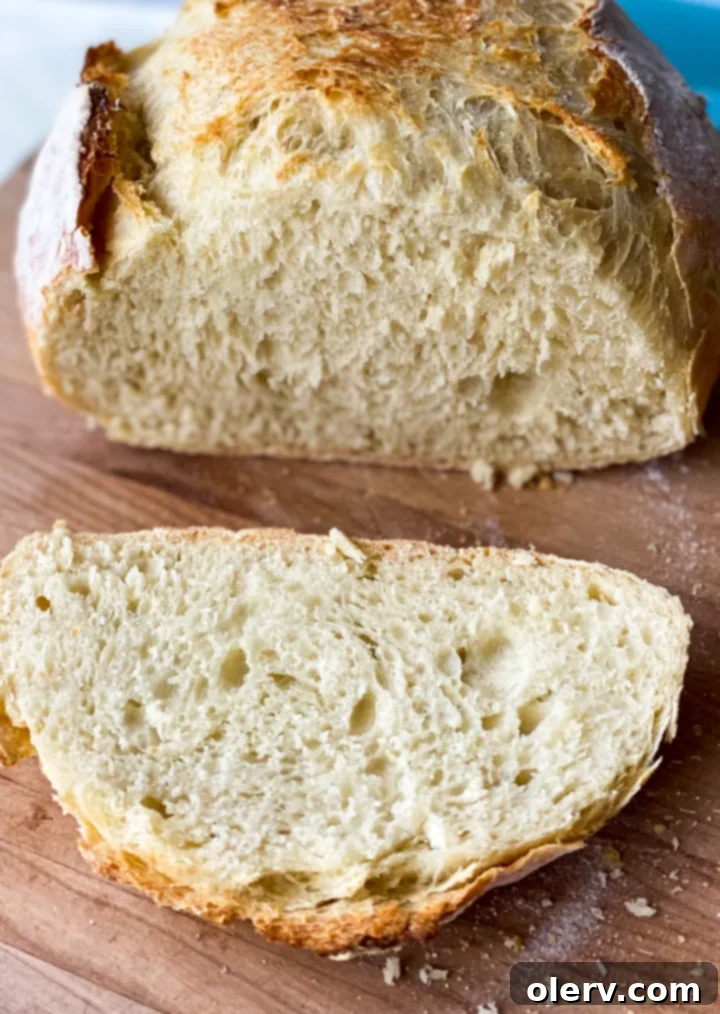
If you give this recipe a try, let me know! Leave a comment, rate it, or snap a photo and tag it with @TheAlexDaynes on Instagram! I love to see what you’ve been cooking. It always makes my day!
LIKE THIS RECIPE AND WANT TO SAVE IT FOR LATER? PIN IT TO PINTEREST HERE!
Easy Homemade Bread
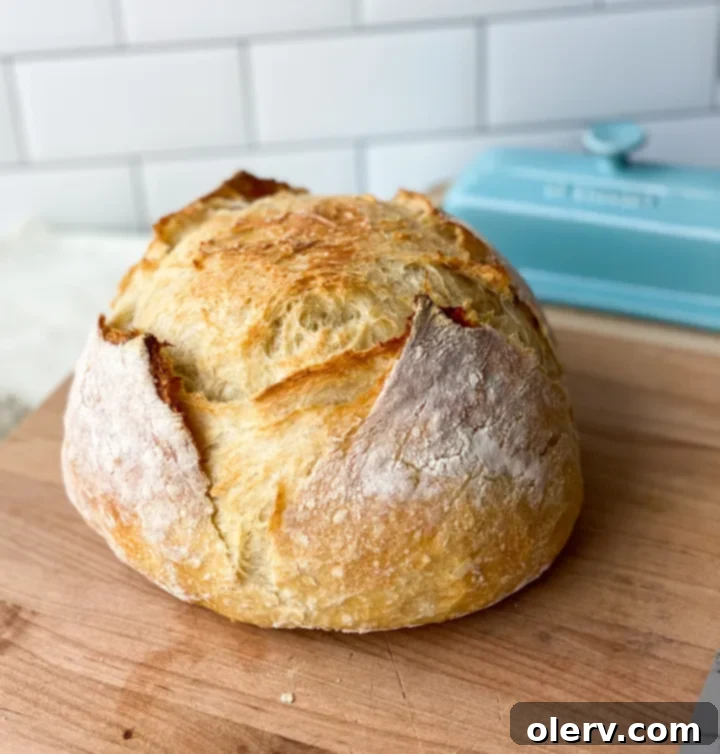
This is the easiest 4 ingredient homemade bread recipe. With only 4 ingredients (water, flour, yeast, salt) and no-kneading, you can have fresh bread in your home.
12 hours
45 minutes
12 hours 45 minutes
Ingredients
- 3 1/4 cups all-purpose flour
- 2 teaspoons salt
- 1 teaspoon active dry yeast
- 1 1/2 cups warm water
Instructions
- Start by whisking the flour, salt, and yeast together in a medium-sized bowl.
- Gradually add the warm water to the dry mixture, and stir using a wooden spoon or a dough hook. Mix the dough gently until it begins to come together. The dough will be sticky. Once the dough is ready, form the dough into a ball.
- Transfer the dough ball to a large bowl and cover with plastic wrap. Place it out of the way in a room-temperature area. Let the dough rest and rise for 12-18 hours, or until the surface is covered in bubbles and the dough has at least doubled in size. I typically leave it overnight.
- When the dough is ready, place a Dutch oven into your oven and turn it on to 450°F. Let the Dutch oven warm-up for about 30 minutes or so while it comes to temperature.
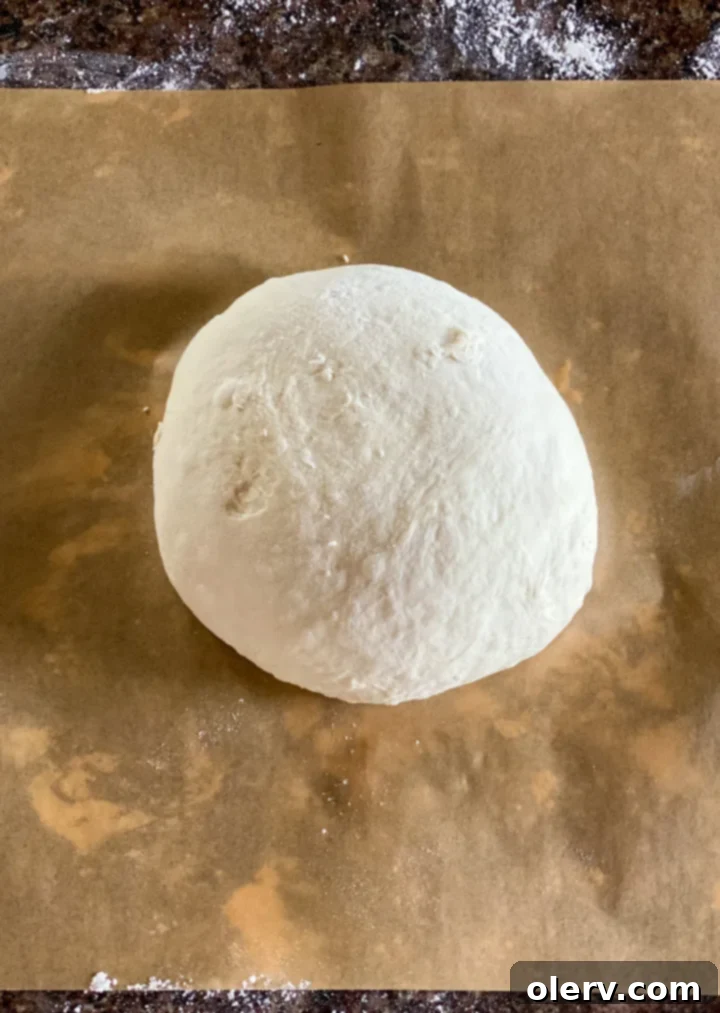
- Transfer the dough to a floured surface. To shape the dough, fold the edges in on itself several times. Turn the dough over and begin forming the final shape giving it a nice, smooth surface ball.
- Place the dough on a large square of parchment paper, then dust with flour and let it rest for 15 minutes.
- Next, use a sharp knife to score an X-shape into the top of the dough.
- Remove your preheated Dutch oven from the oven, and place the parchment paper and dough inside. Cover the Dutch oven and bake for 30 minutes.
- After 30 minutes, remove the lid and bake your bread for an additional 10-15 minutes. You want the top to be nice a dark, but not burnt. Remove from the oven and transfer your bread to a cooling rack. Cool the bread for 30 minutes before slicing and serving.
Notes
*Make sure yeast is fresh and unexpired before baking
*Water should be warm, not hot to the touch before adding it. Too hot water will kill the yeast.
*Don’t overwork the dough. It will feel sticky before allowing it to rest and rise. If it still feels sticky after step 5, add an additional tablespoon or two of flour to the dough and work it in.
*This bread resembles the taste and texture of sourdough bread because of the long rise time. The yeast breaks down the flour and gives it a very subtle, delicious sour taste.
Recommended Products
As an Amazon Associate and member of other affiliate programs, I earn from qualifying purchases.
- Dough Whisk – 14.5 in
- Dutch Oven
Nutrition Information:
Yield:
4
Serving Size:
1
Amount Per Serving:
Calories: 371Total Fat: 1gSaturated Fat: 0gTrans Fat: 0gUnsaturated Fat: 1gCholesterol: 0mgSodium: 1063mgCarbohydrates: 78gFiber: 3gSugar: 0gProtein: 11g
Other Bread/Dough Recipes on AlexDaynes.com
Easy Sourdough Pizza Crust
Sourdough Cinnamon Rolls
Sourdough Dinner Rolls
